

Projects
The Build Journal
A compilation of our project’s journeys & conversations

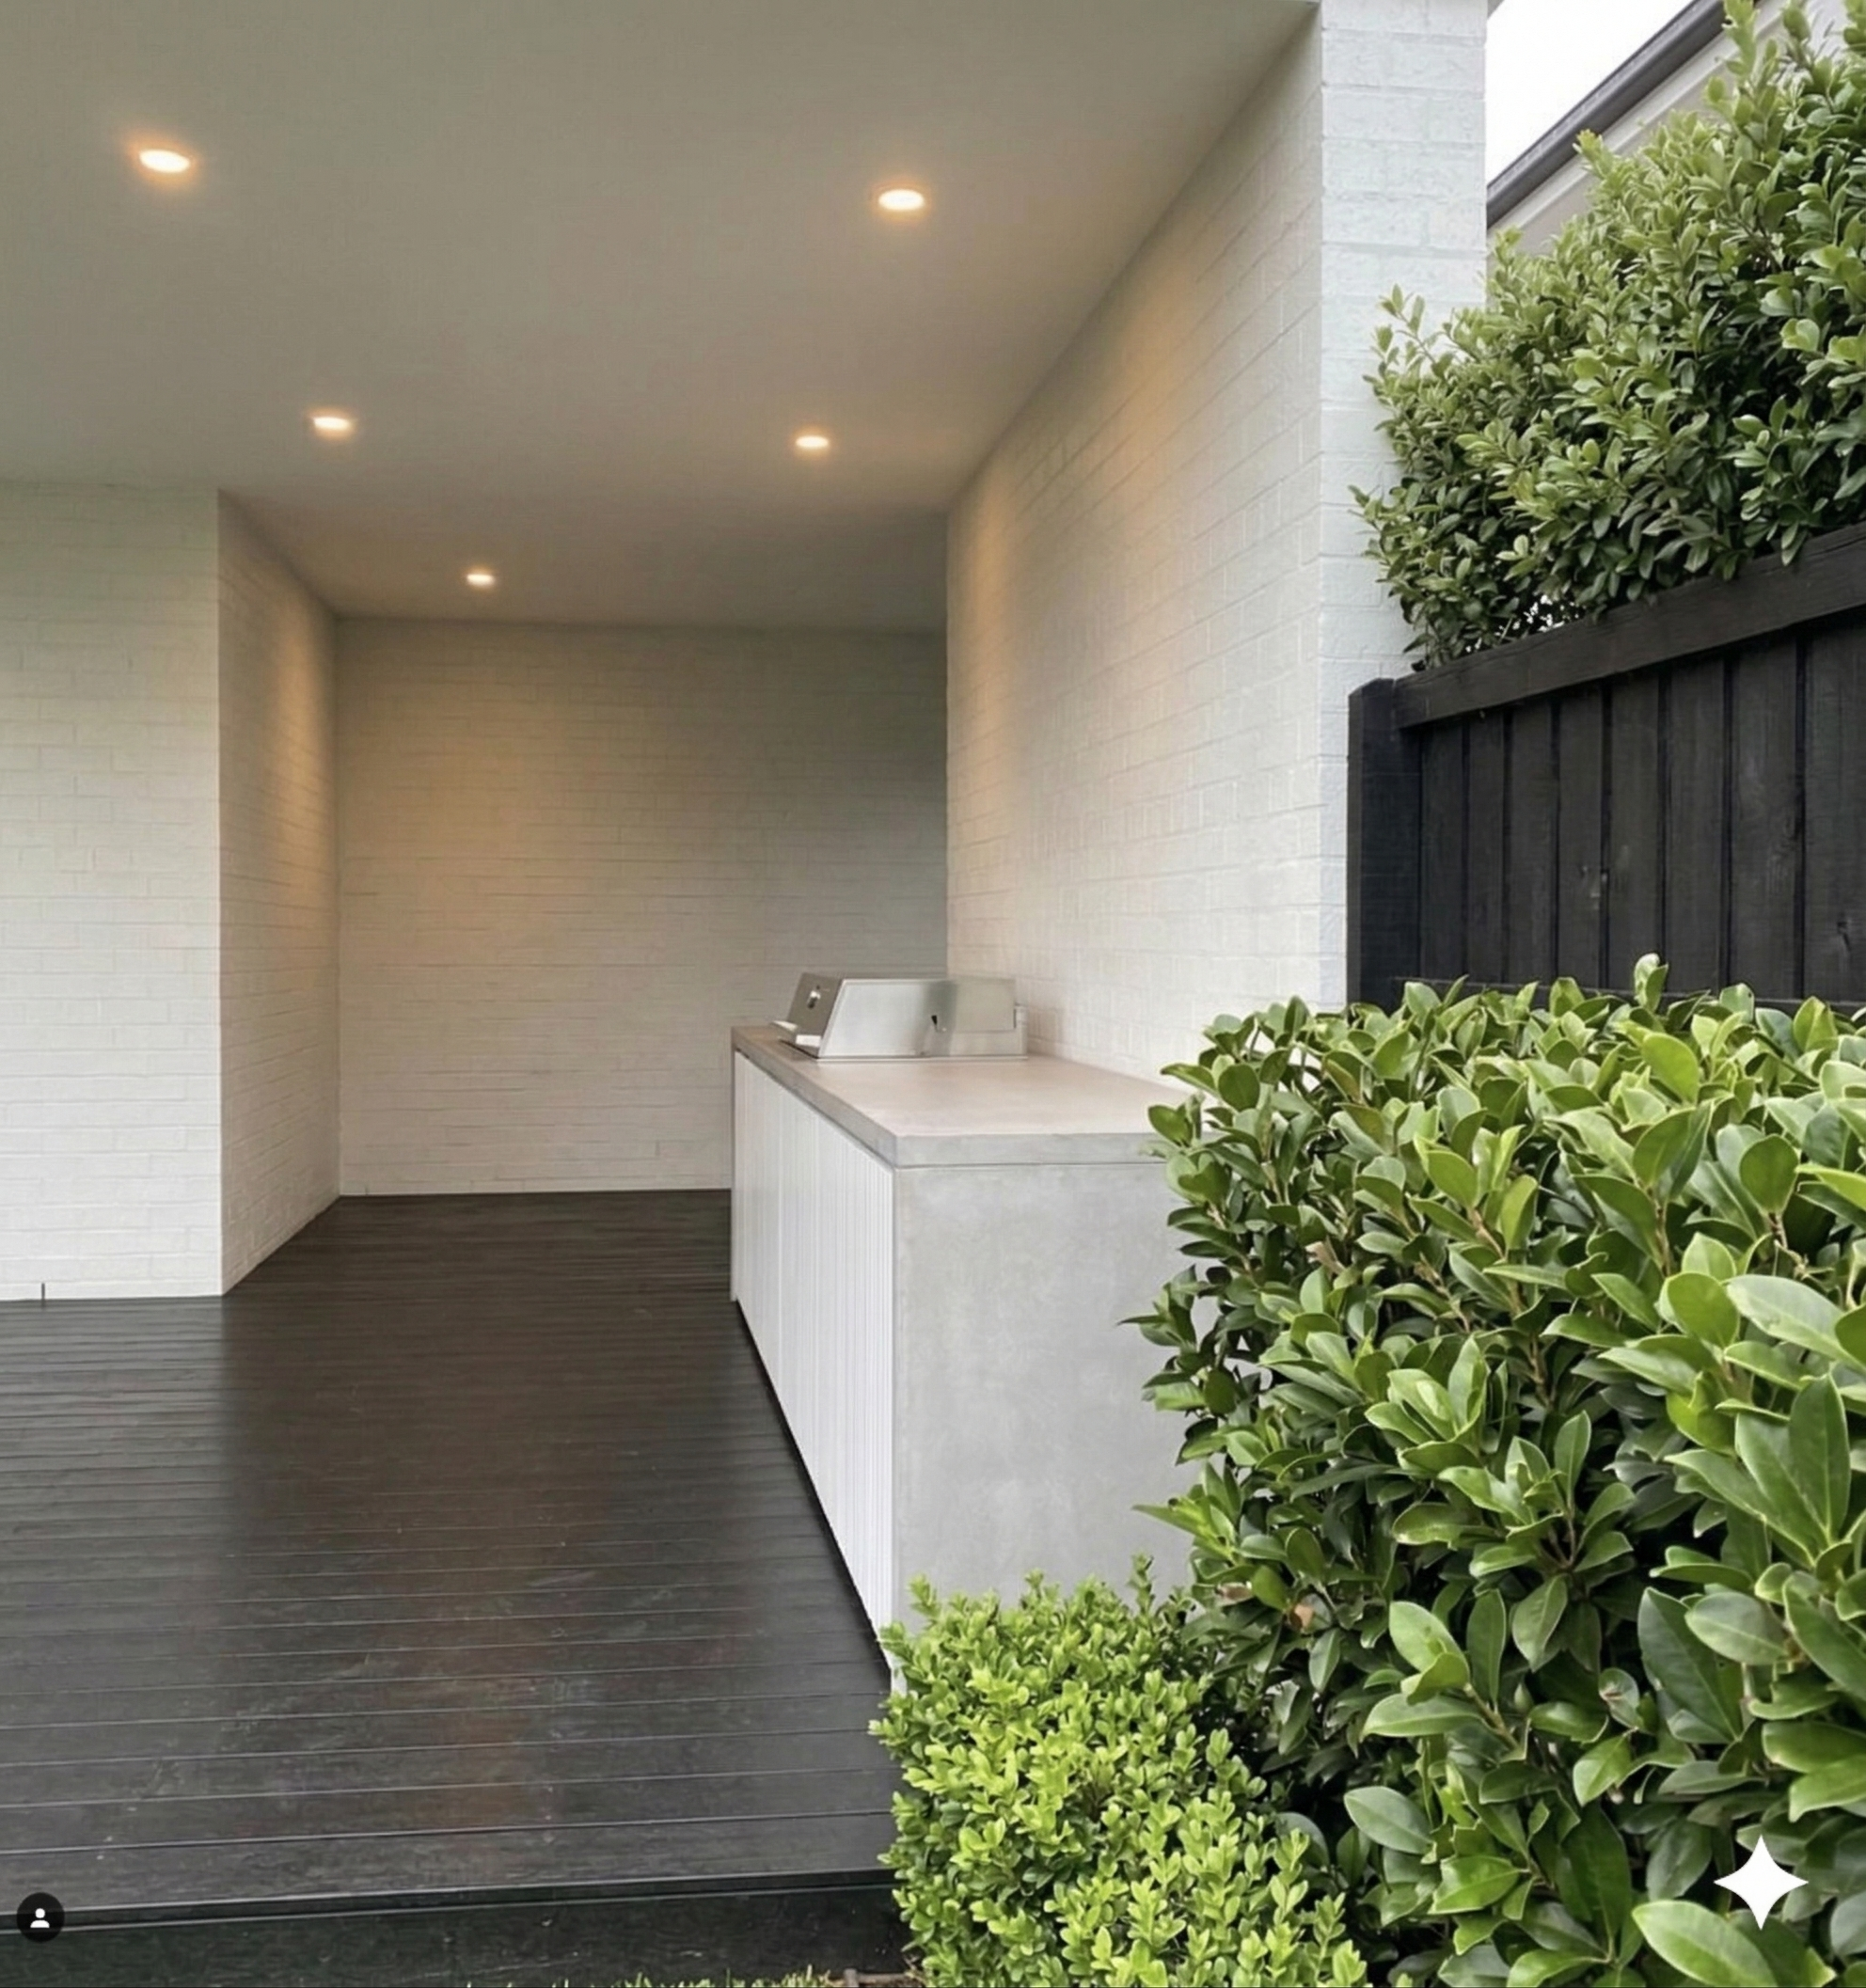
A Coastal Outdoor Kitchen Built for Freshwater Living
The brief | a new alfresco area that actually gets used
A young family in Freshwater came to us with a pretty clear vision.
They'd just finished landscaping their backyard, had a new alfresco area to work with, and wanted an outdoor kitchen that felt like it belonged there, something coastal, clean, and built to last.
They didn't want a flat-pack. They didn't want something that looked like it came from a hardware store.
They wanted a custom kitchen that fit their space exactly and reflected where they live. Freshwater is that kind of suburb. People there care about how their home looks and feels, and they're willing to invest in doing it properly.
The brief was straightforward | a solid built-in BBQ setup with good bench space, storage underneath, and a finish that tied into the relaxed coastal vibe of the rest of the yard.
Project type |
New alfresco outdoor kitchen

Location |
Freshwater, Northern Beaches

Benchtop |
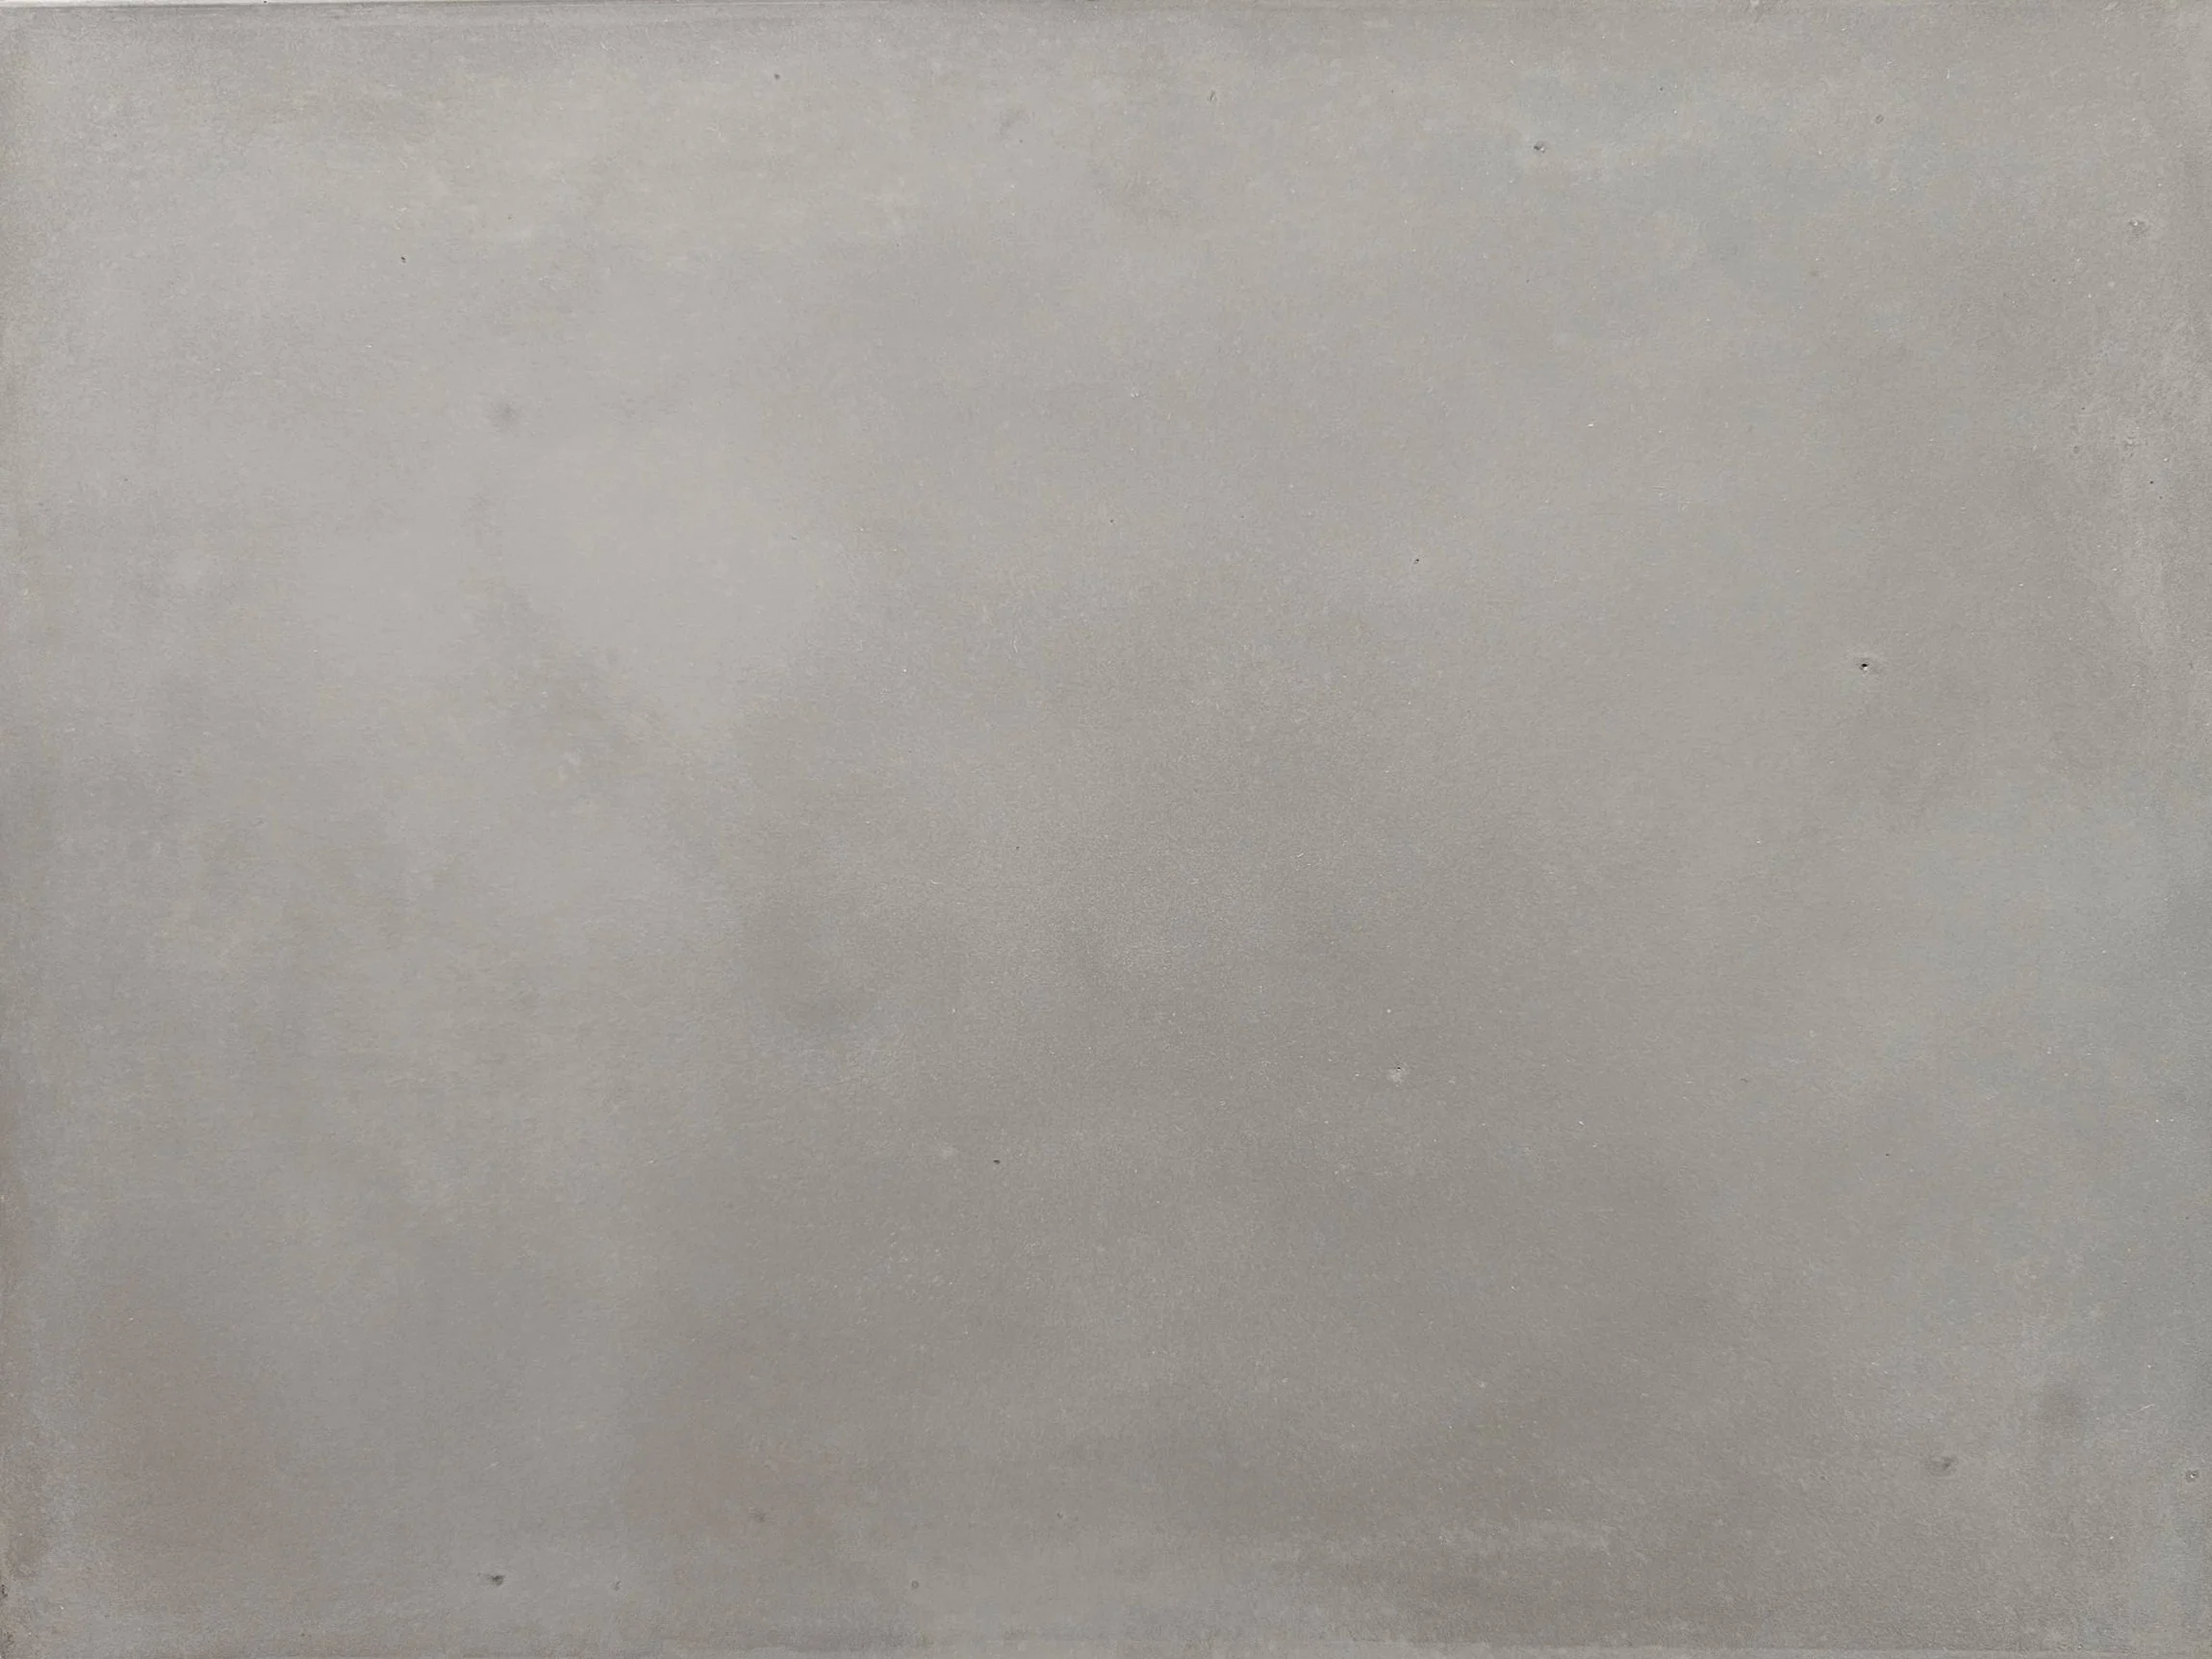
Iron Storm (Lite - Stormy grey)
Cladding style |
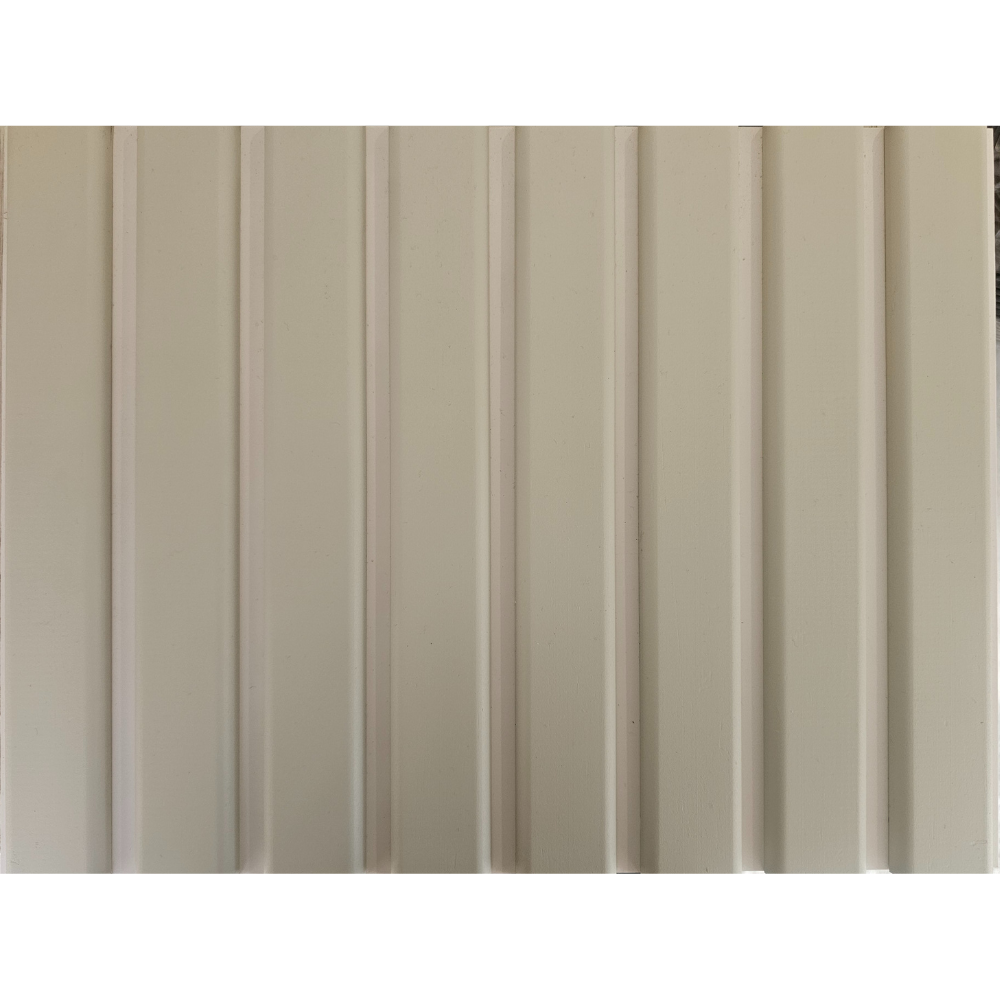
Americano
BBQ |
BeefEater Signature ProLine 6 Burner Built-In

Design Process |
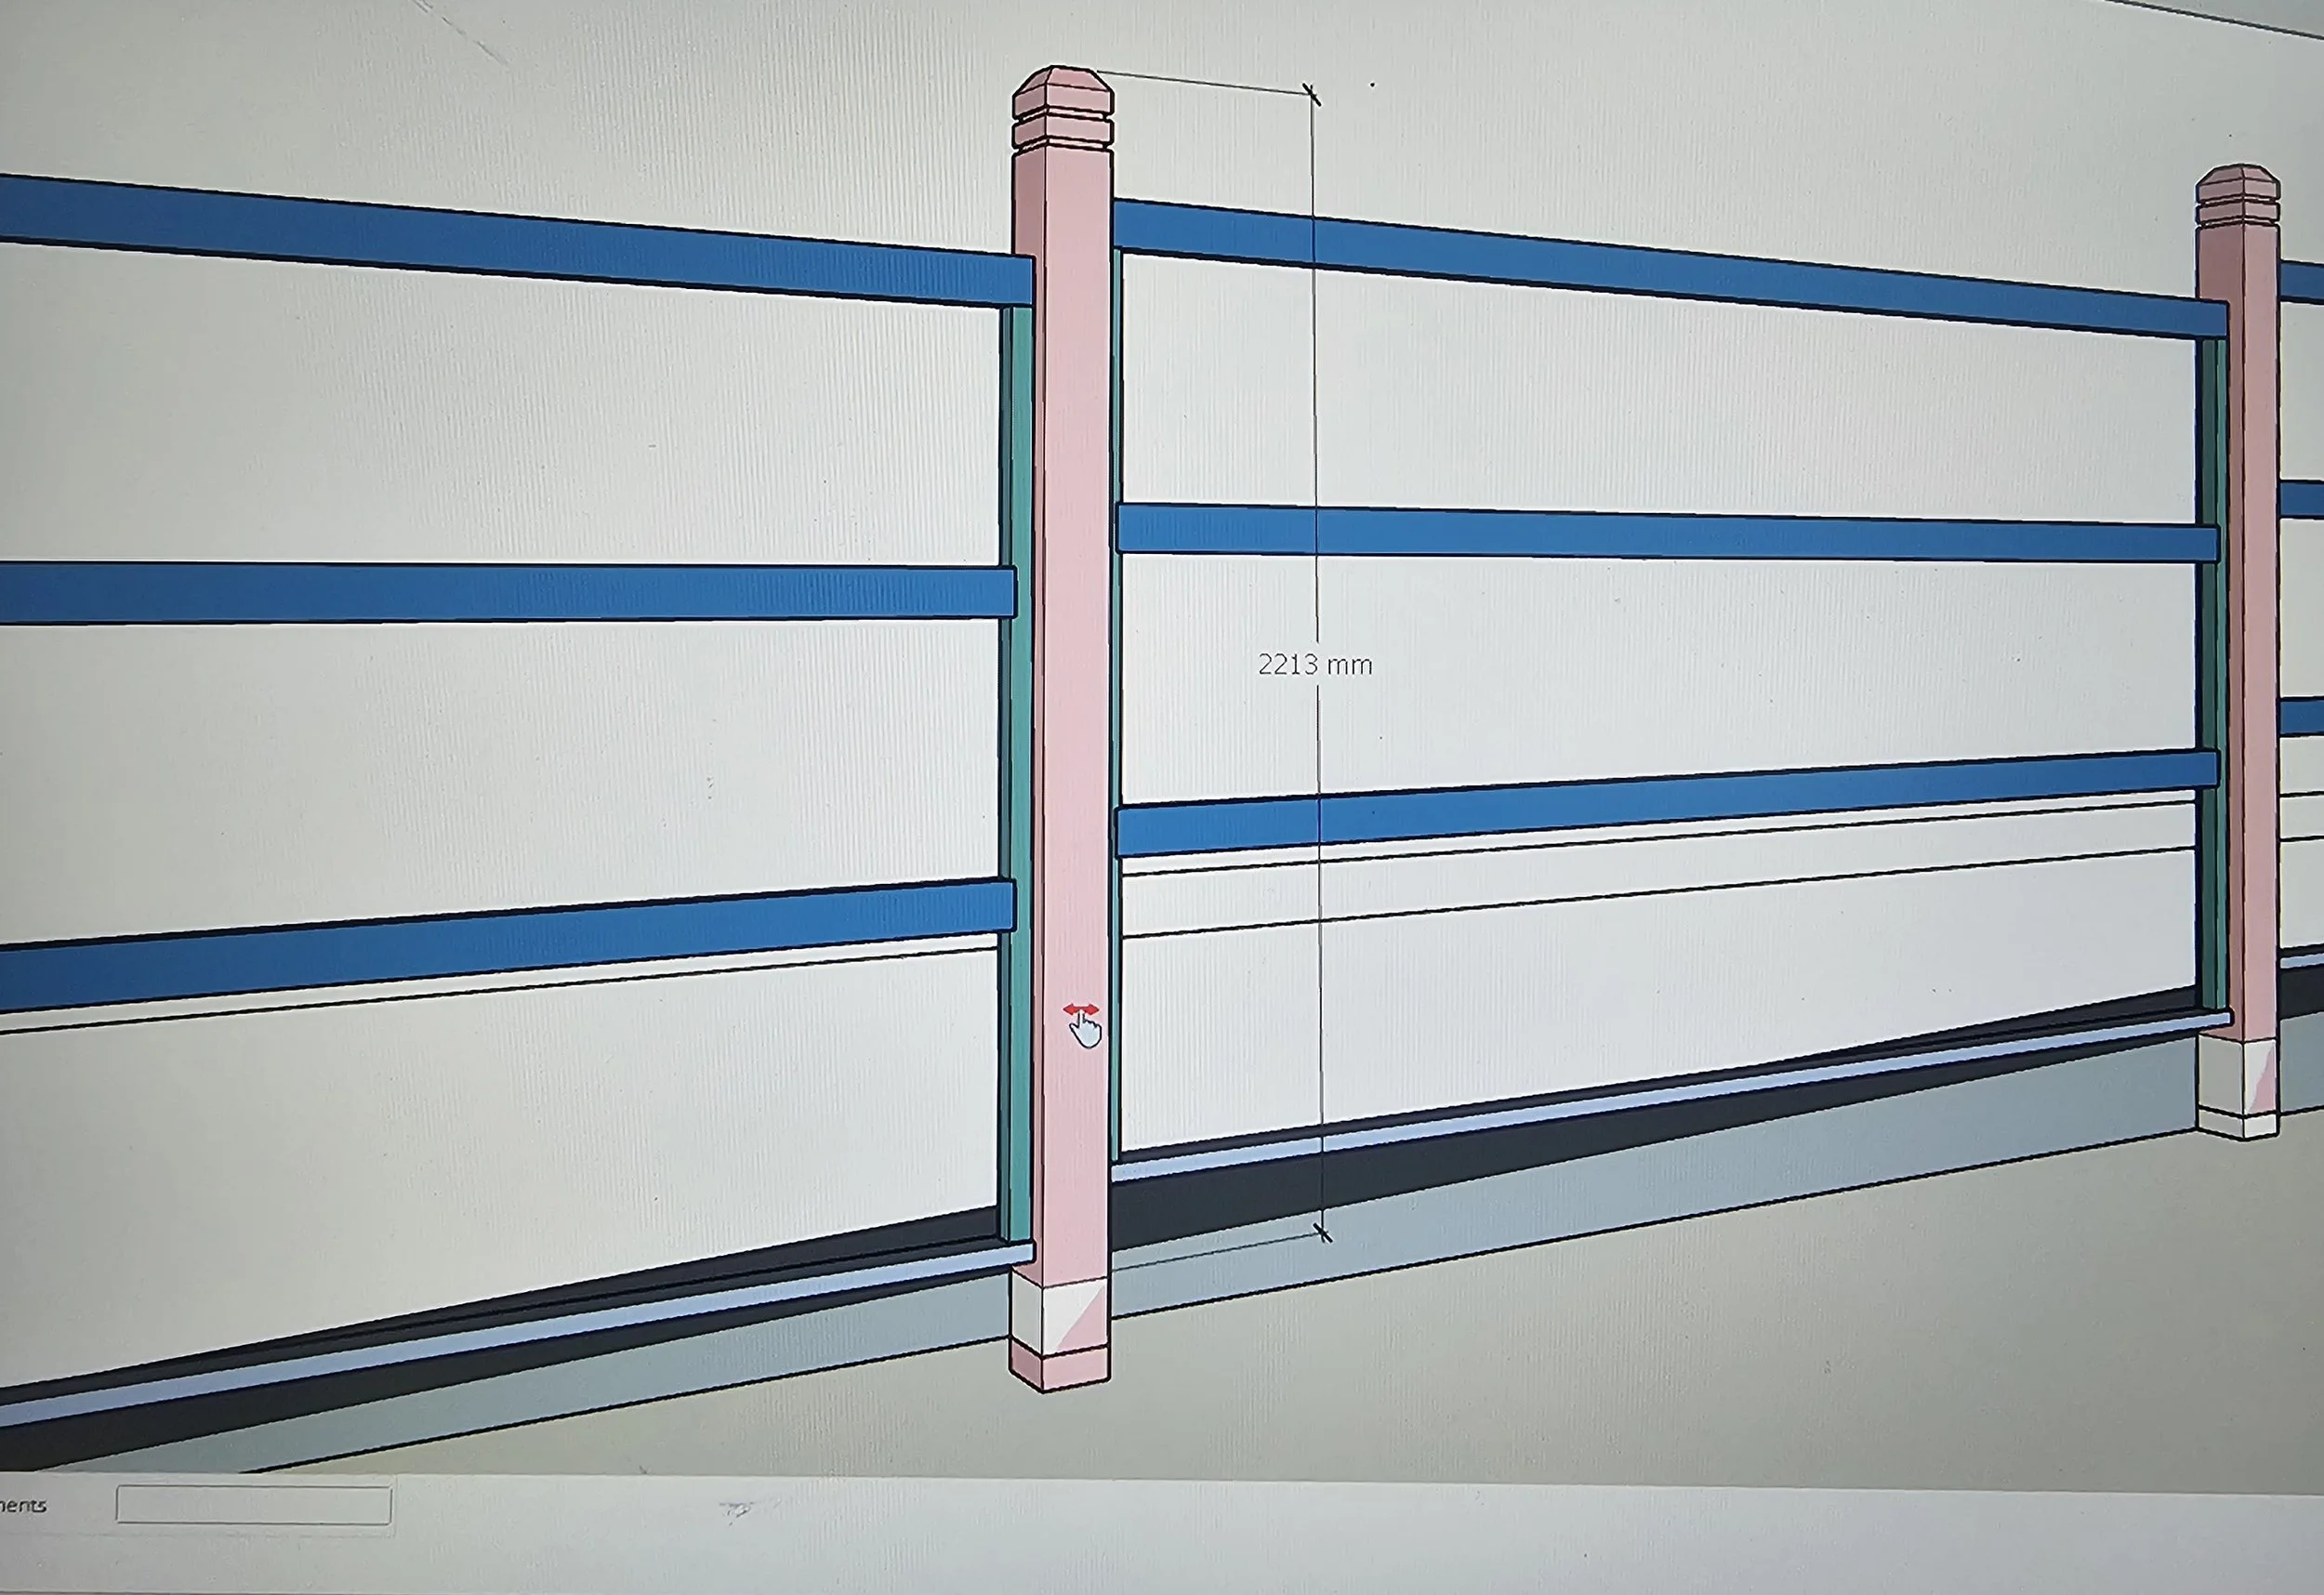
Full 3D design before build

How we built it | the process
Once the design was locked in and the client gave us the green light, here's how the build came together.
01 | Site prep & Framing
Material & accessories orders (BBQs + Fridges, etc.), after design confirmation, we create our takeoff sheet & send all our purchase orders.
We started with the structural frame, which is built to handle the weight of the concrete benchtop and everything that will be placed on it. The frame is the part nobody ever sees, but it's what makes the difference between a kitchen that remains solid in ten years and one that doesn't.
Then we create our custom carcasses, each of which is designed to live a tough outdoor life. We use a special material that is used on marine applications.
3rd Party tradies, we organised a new gas line, which was installed before the installation of the carcass.
02 | Pouring the Iron Storm benchtop
The benchtop is one of our favourite parts.
Now that we have our frame & carcass complete, we know the exact dimensions of our subframe to get the perfect bench measurement.
We then start creating the mould out of specialized material to get a desired finish. The waterfall sides are also made from the same material.
Iron Storm Lite is a slightly softer version of our Iron Storm colour, it's got that cool grey-charcoal tone but a touch lighter, which works really well in a coastal space where you don't want it feeling too heavy, & contrast nicely with the colour surfmist & americano style cladding.
Then it’s prep after the moulds are prepped, then we prepare the mixtures, mixing all our pigments with our special GFRC blend dry, we then mix & pour, set, treat & polish all our concrete in-house.
03 | Americano cladding install
Ordering our custom milled, treated & primed trims, once they arrive, we then start painting.
The Americano style battens are specially treated timber & painted battens that can go on covered & external builds, perfect for an alfresco area. We ran it in Surfmist, which sits beautifully against the Iron Storm benchtop and gives it that clean coastal look without being too dry & industrial.
04 | Beefeater BBQ integration
The Beefeater built-in slotted straight into the bench run. Beefeater makes a genuinely solid product; it's a popular choice for our Northern Beaches and North Shore builds because it handles the coastal environment well, and the quality matches what we're trying to deliver with the rest of the kitchen.
Installation is easy. Beefeater BBQ’s are an easy install due to the design. We can pre-manufacture the inset for some installs. This was an easy winner with great access to carry the rather heavy slab to where it had to be, thanks to a few landscapers who helped us as well.
05 | Installation
Before we book the installation date, we do a complete dry run just to make sure everything is perfecto (sometimes we send photos to our clients as a teaser). After our dry run is complete, we book the installation.
Today is the day, we love install day. Packing the ute & trailers, transporting all materials to the site carefully, then fixing all the components back together. After a few hours, it’s all done and ready for you to enjoy. It’s always satisfying to complete an install & see the product completely finished in its home.
Seeing it before we built it — the 3D design
Every project starts with full to scale, rendered 3D model so you can see exactly what you'll get.
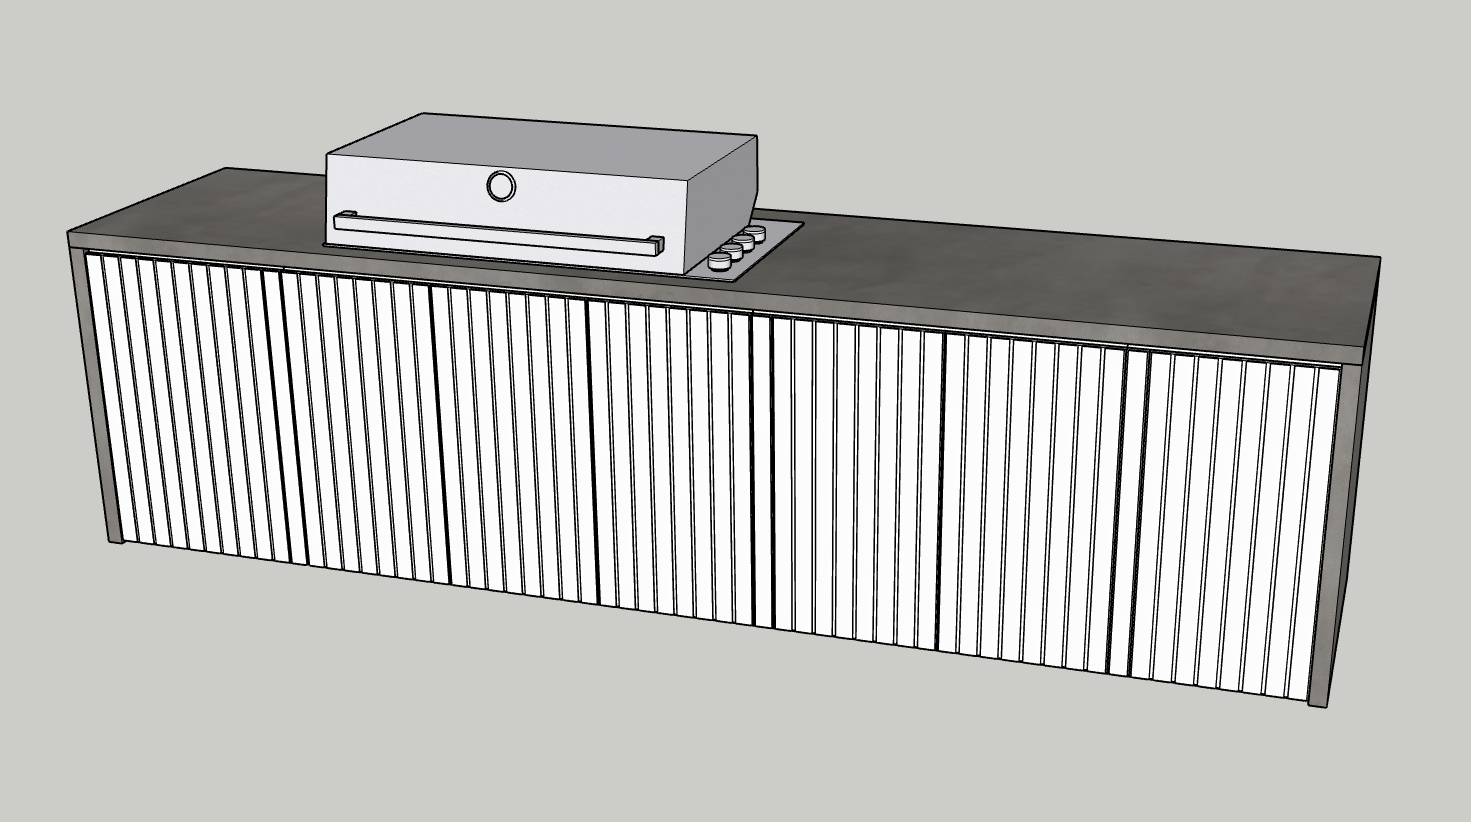
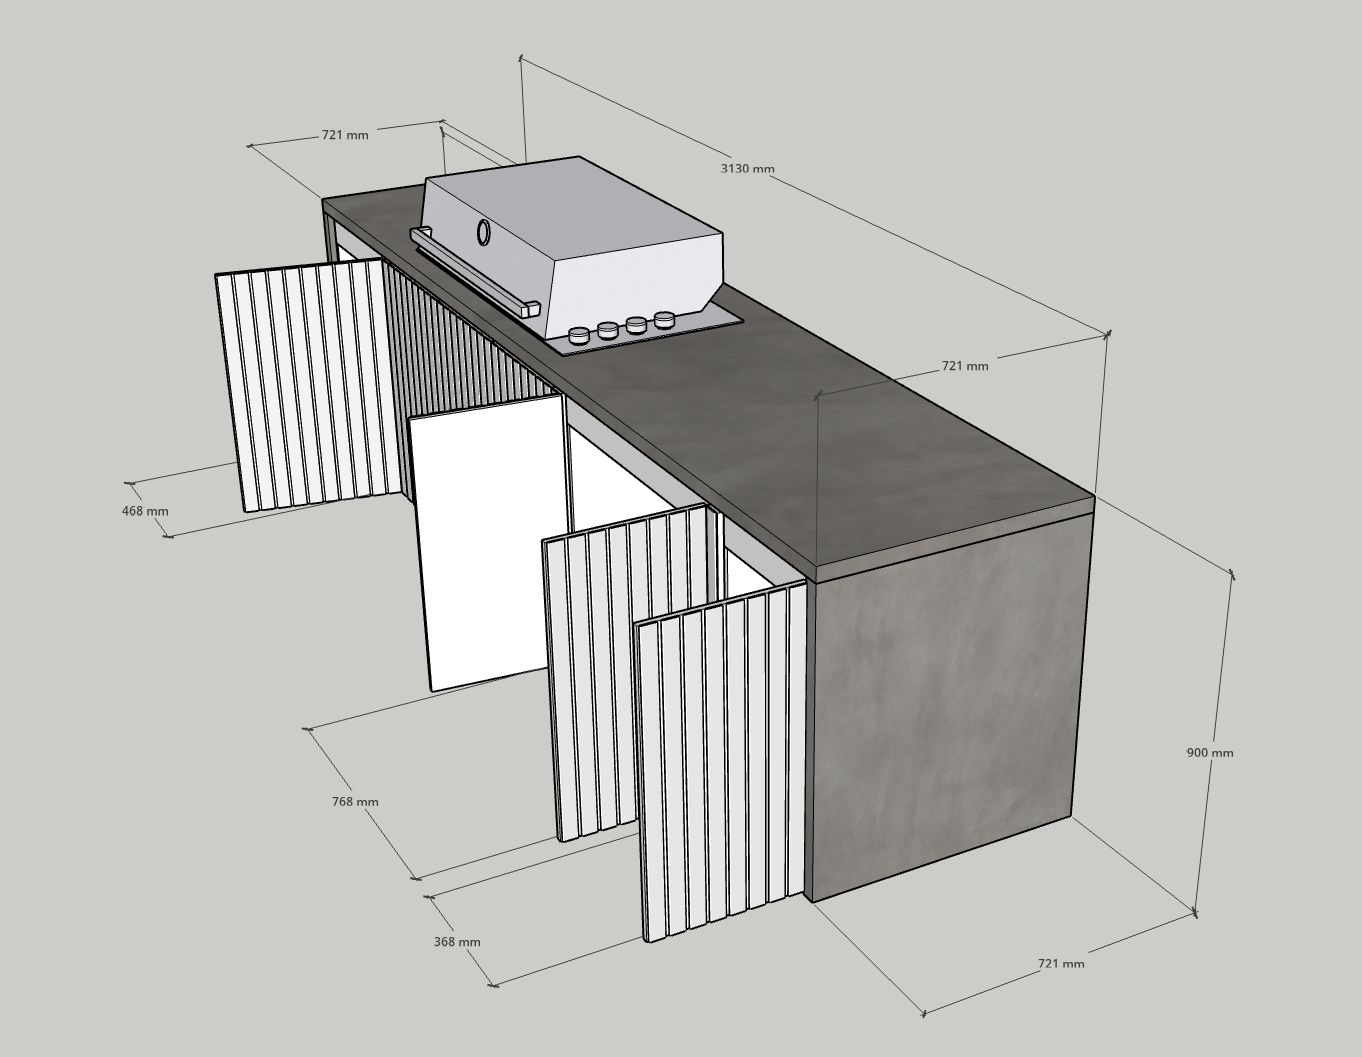
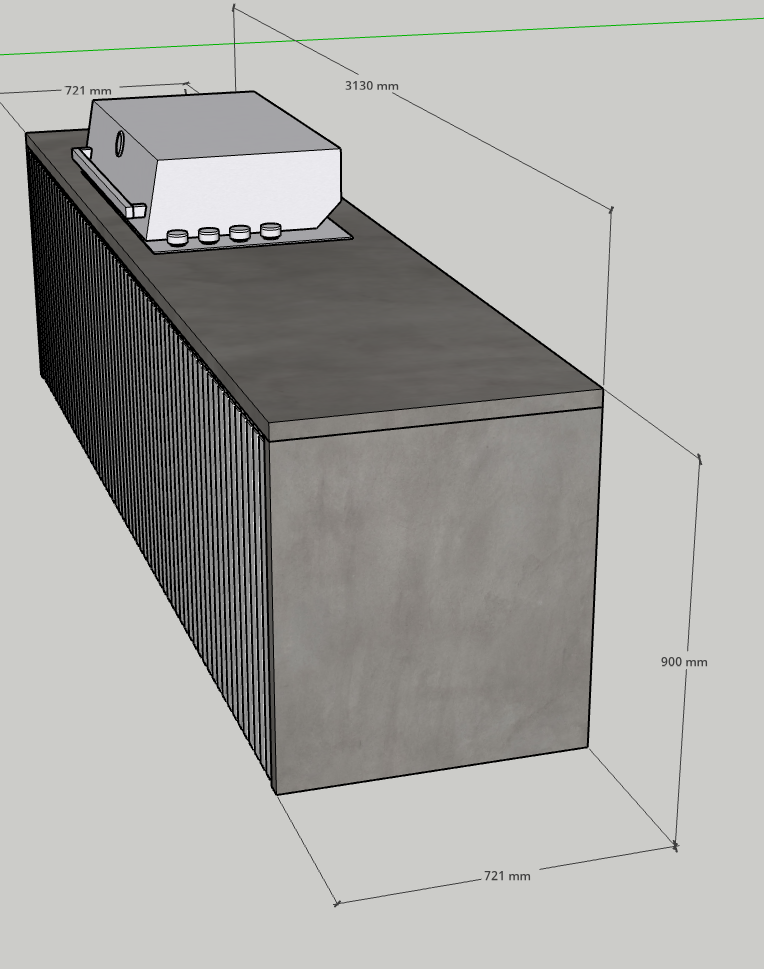
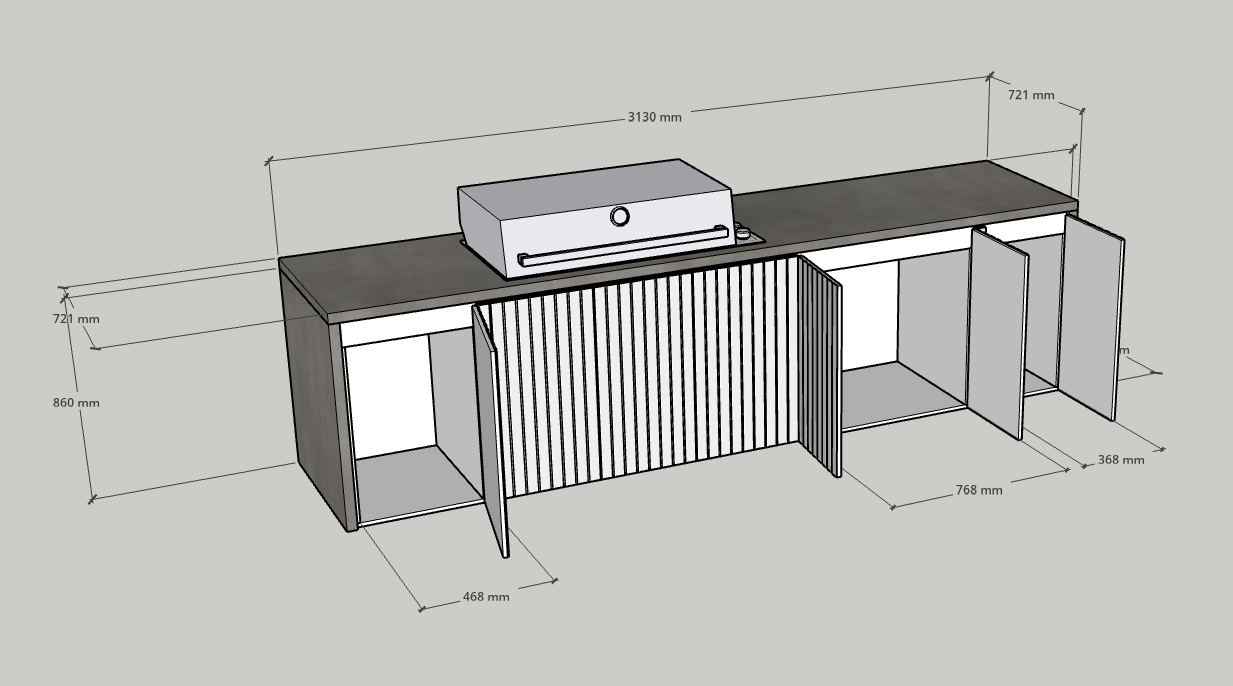
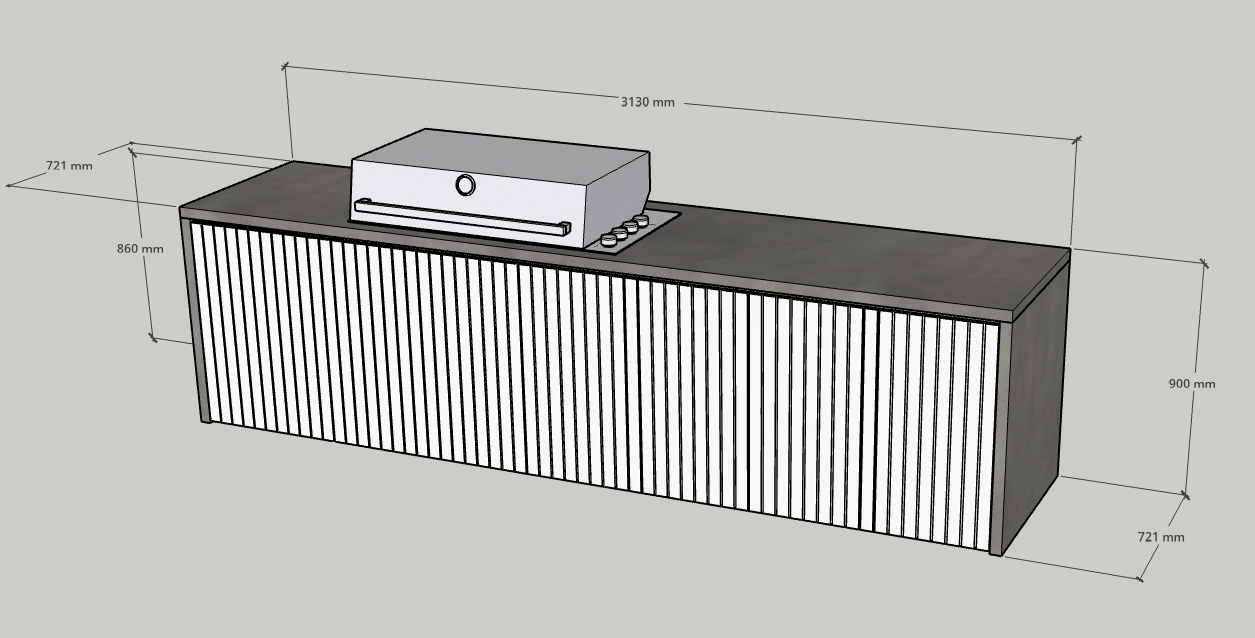
That design process is where a lot of the real decisions get made, and it saves a ton of headaches on site. By the time we started building, everyone knew exactly what the result was going to look like.
The client could see exactly how the Americano-style cladding would sit, how the bench height would work with the space, and how the Iron Storm benchtop would look in that coastal setting.
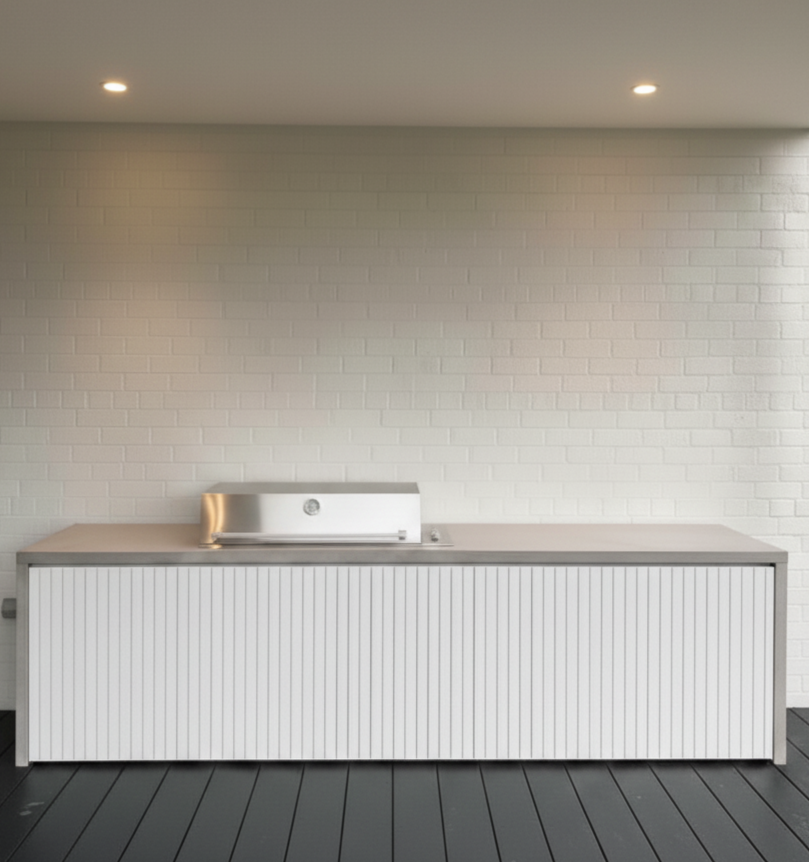
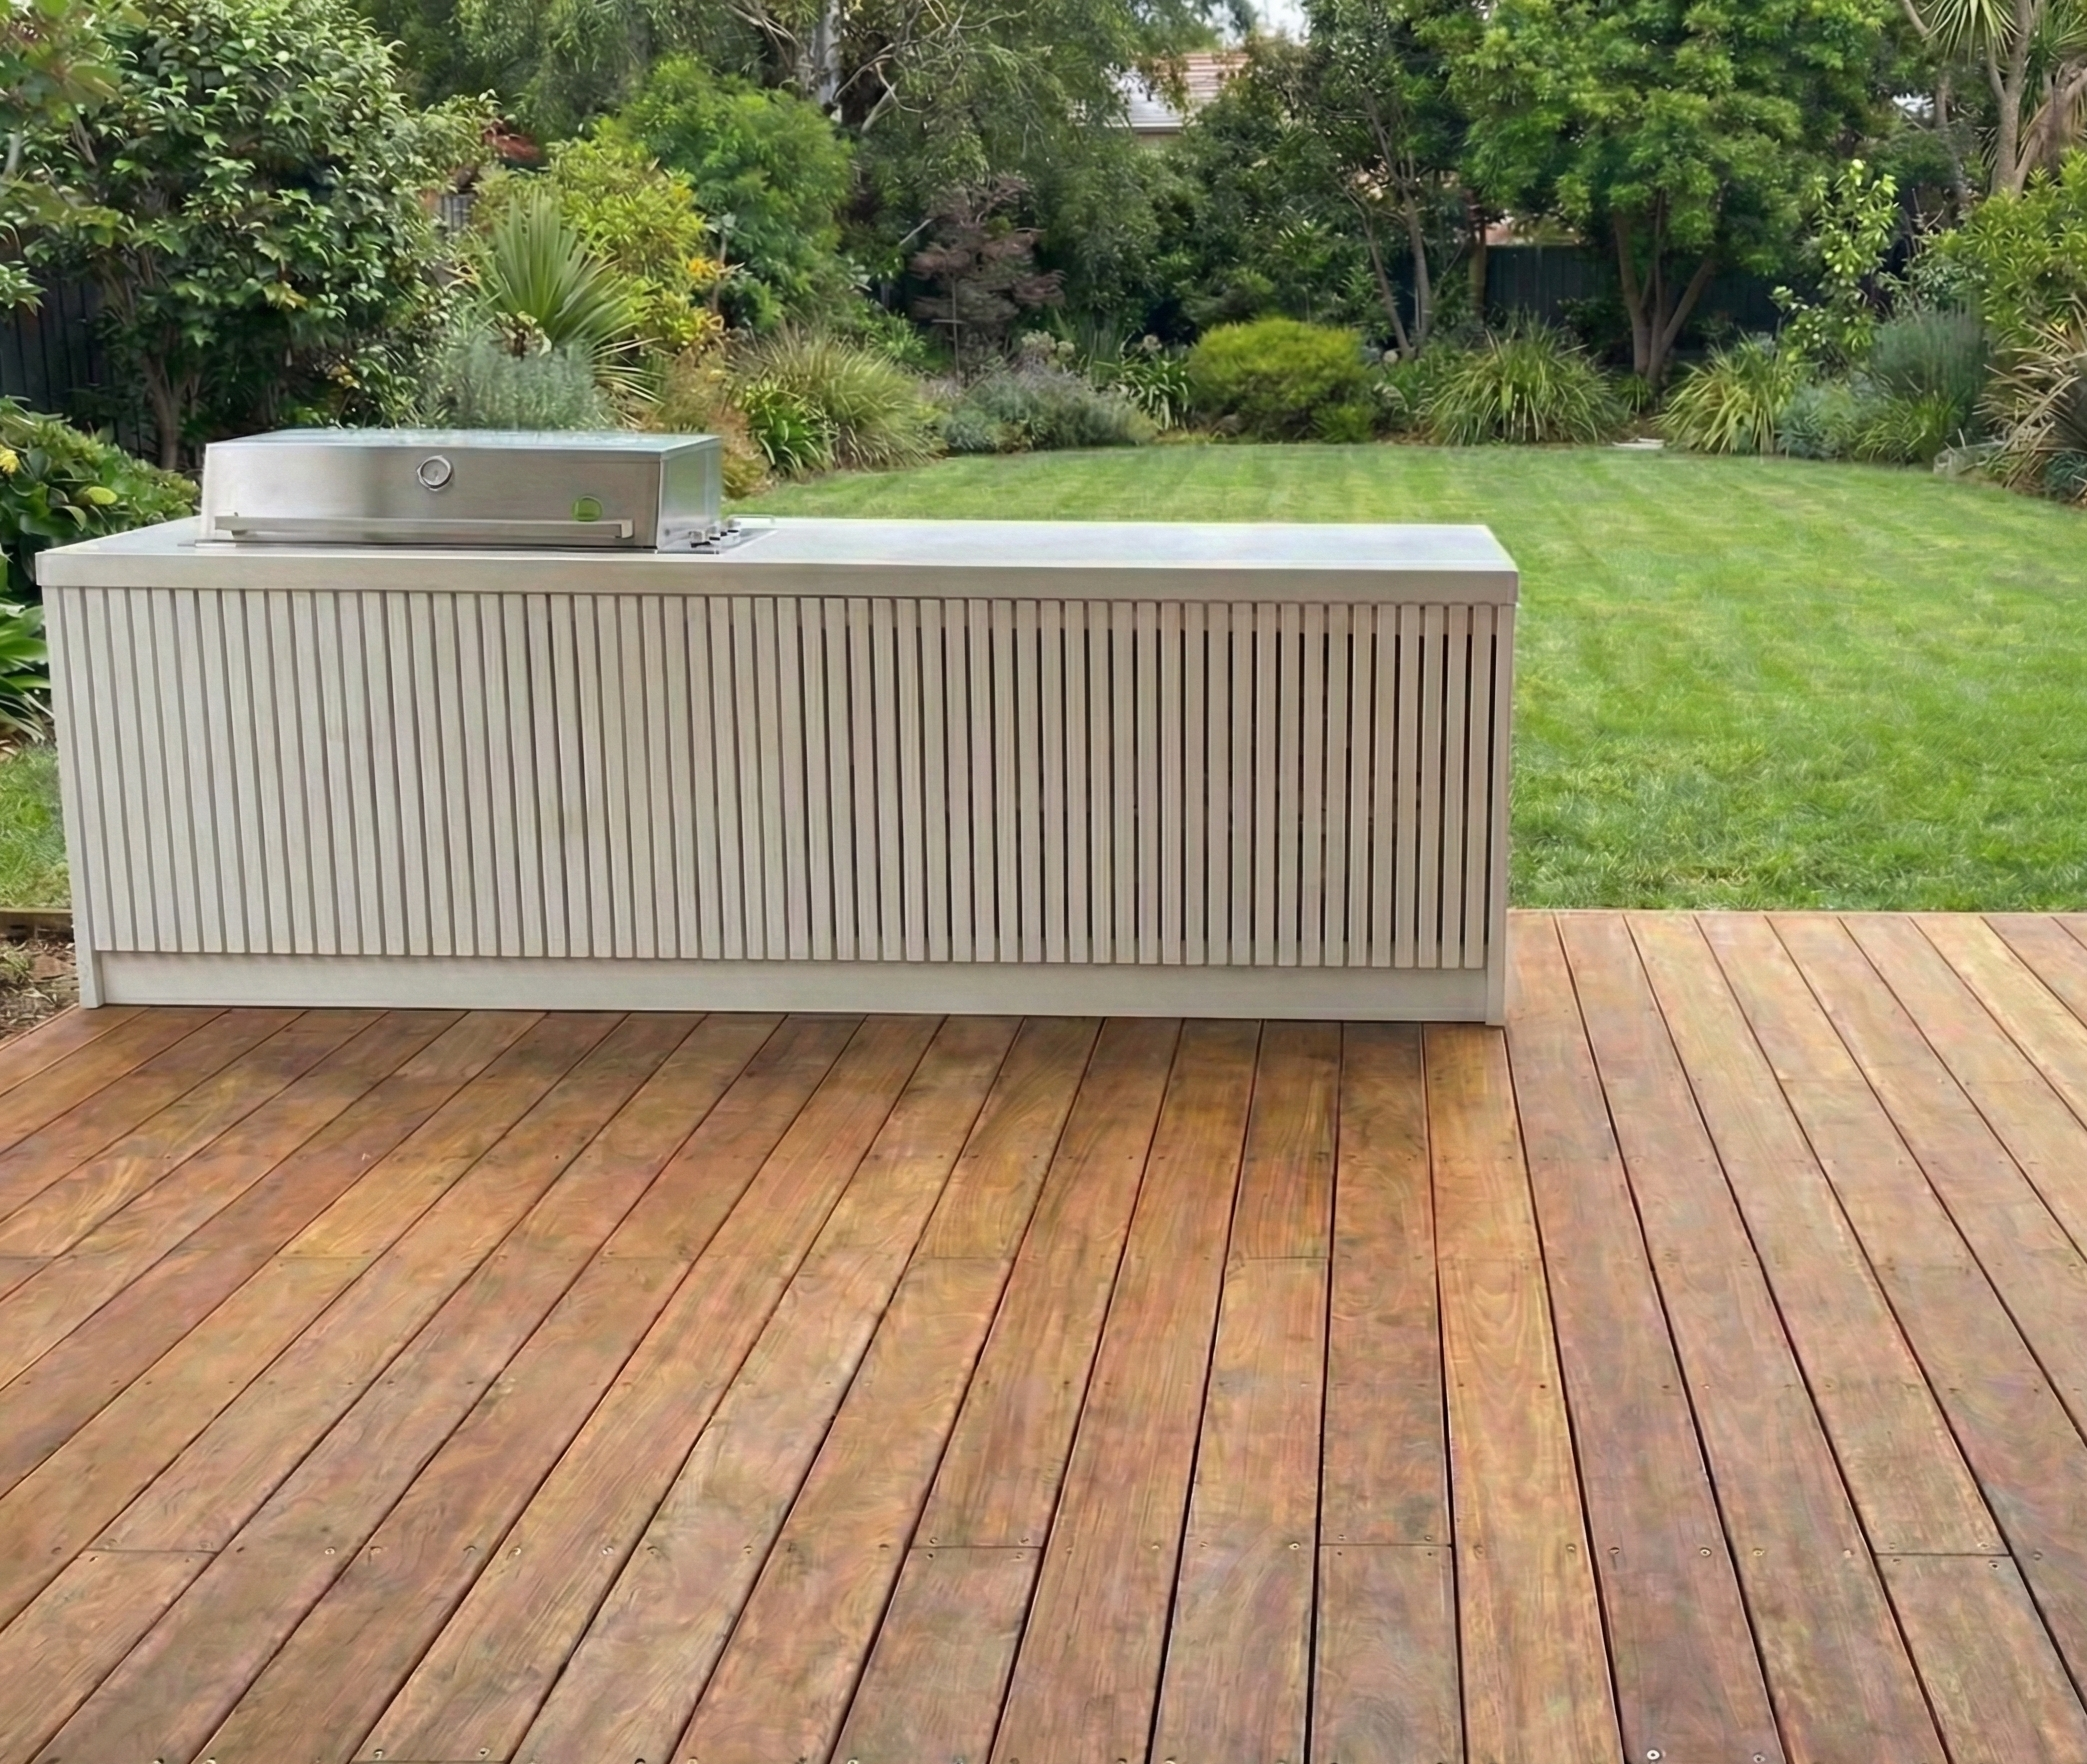
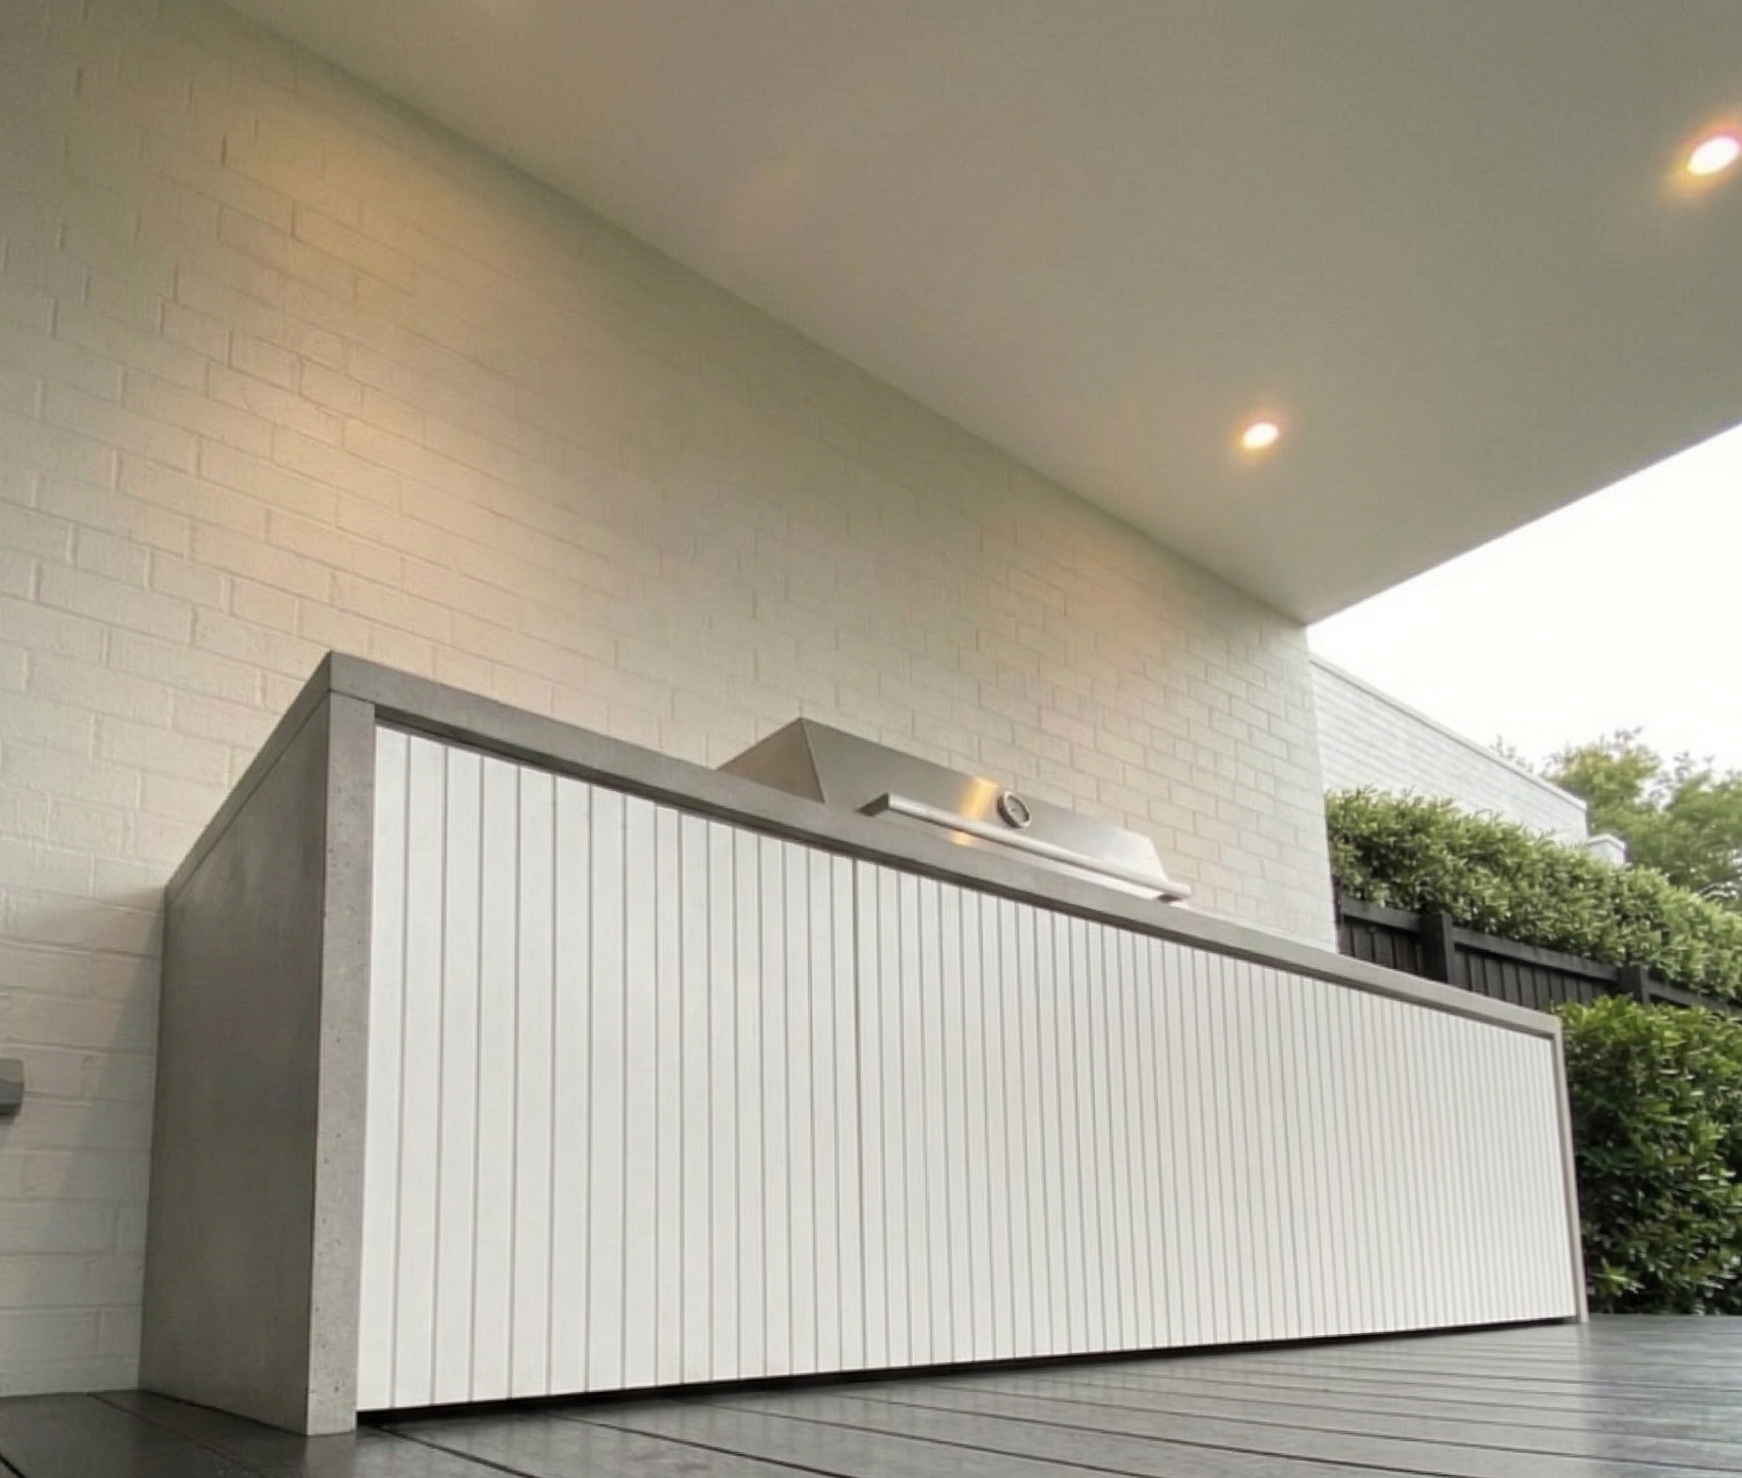
The finished kitchen
The whole build took just under three weeks from start to finish. The family had it fired up for a Sunday session before we'd finished cleaning up
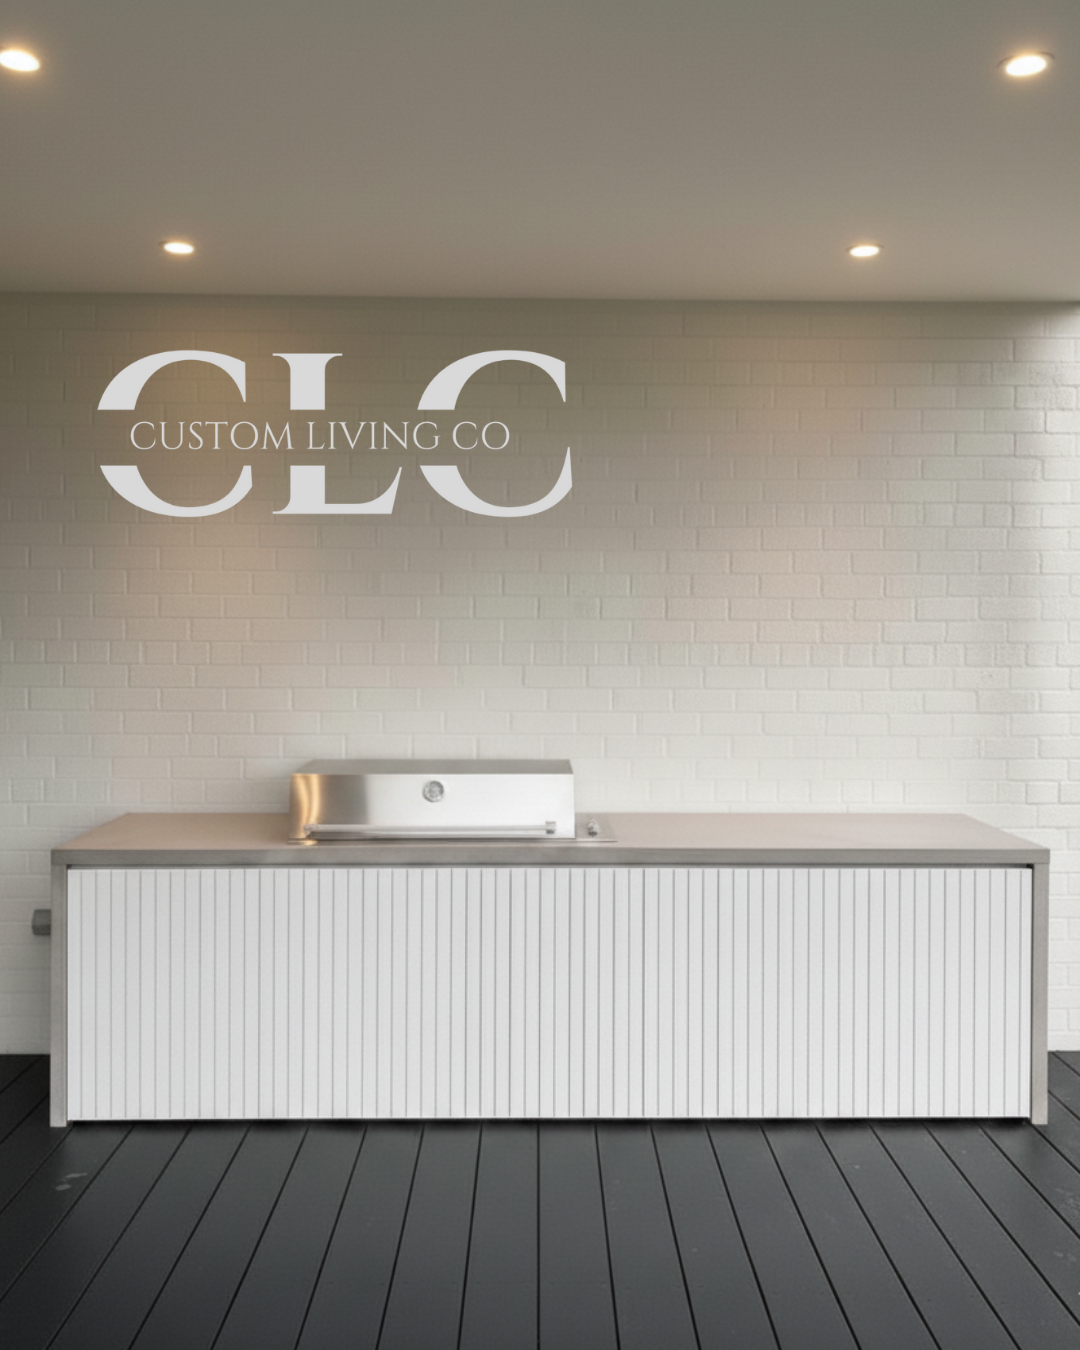
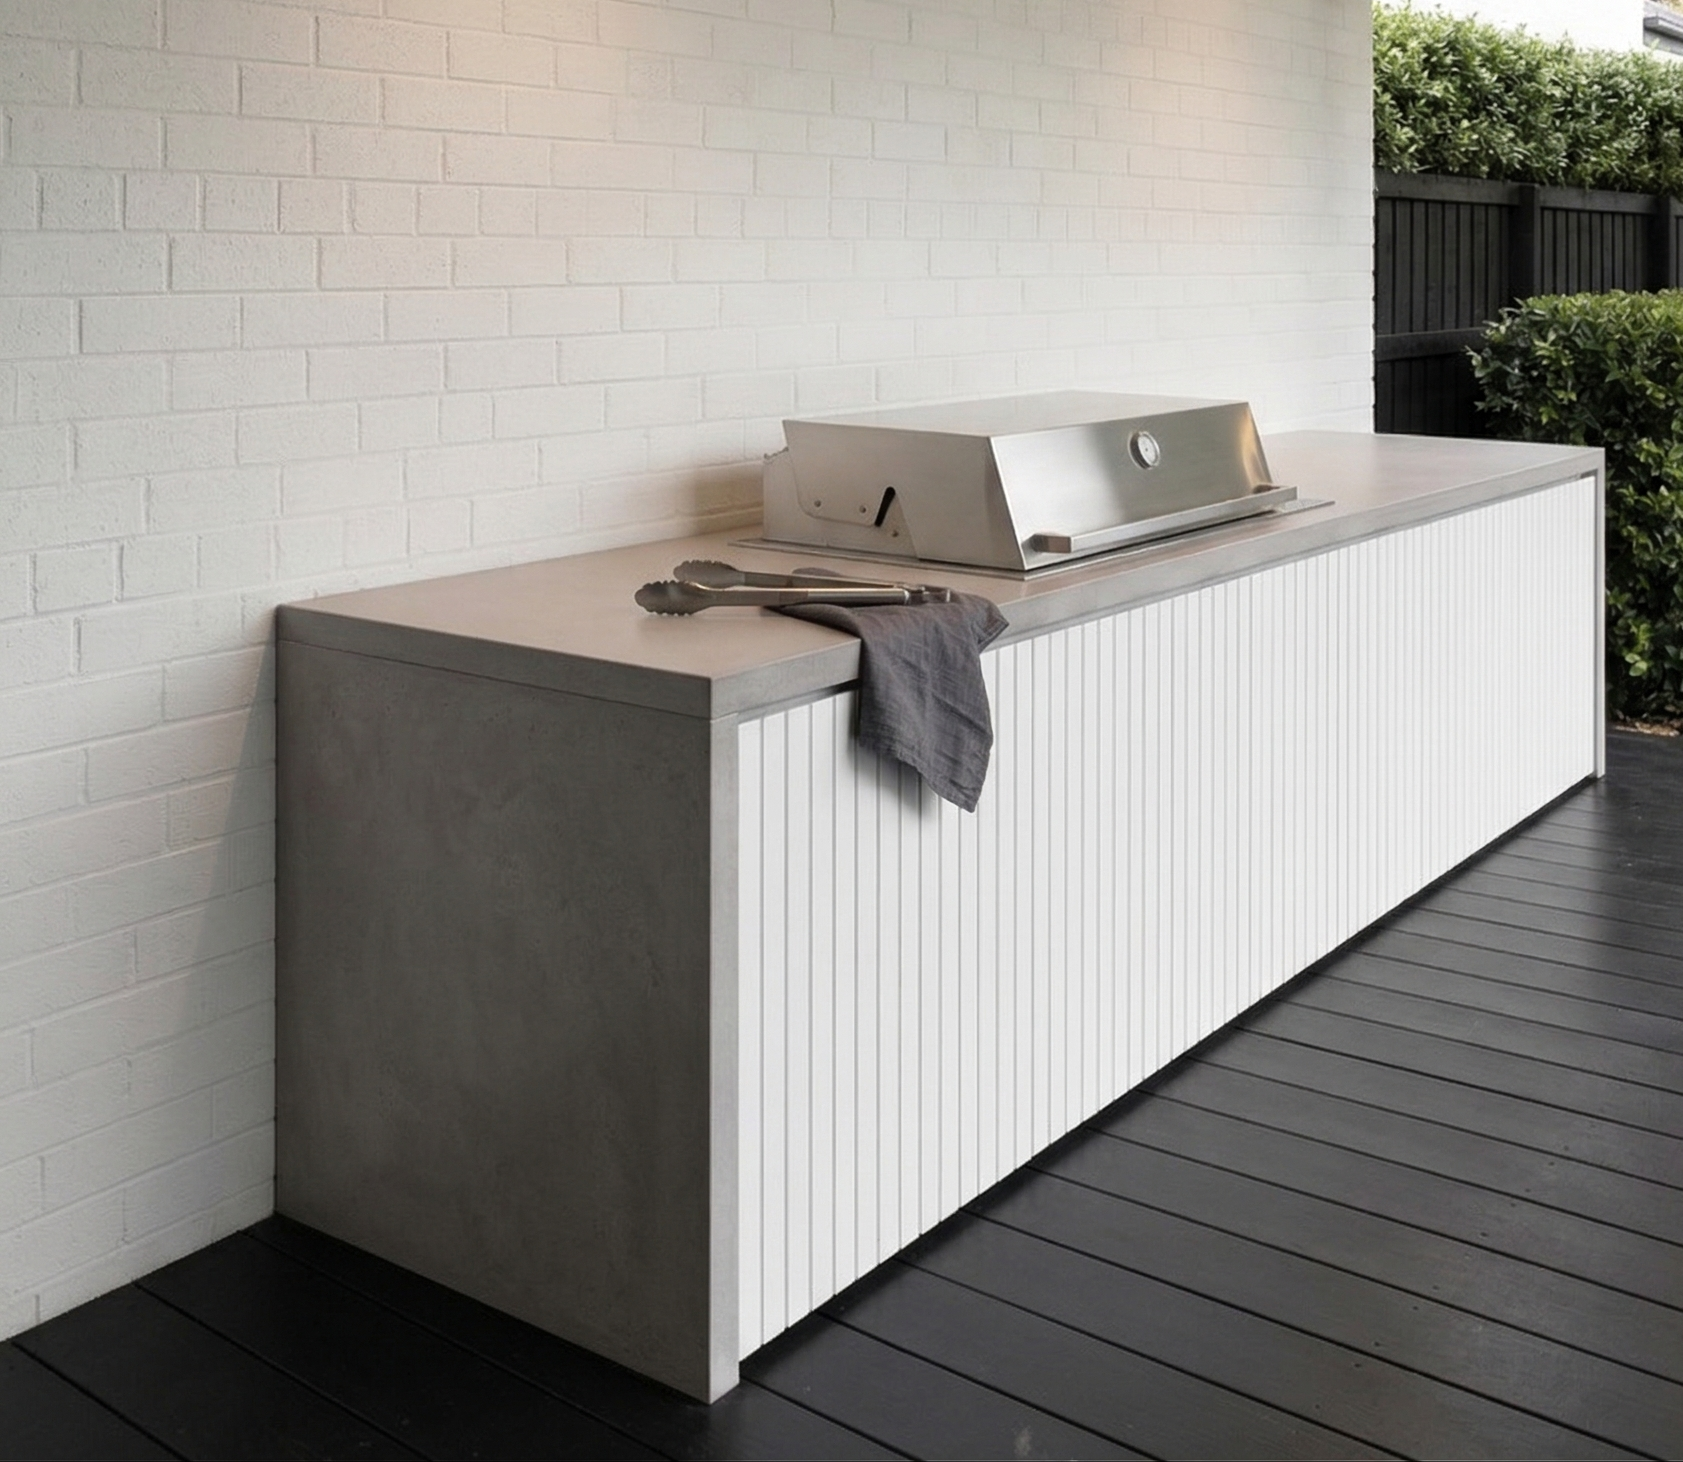
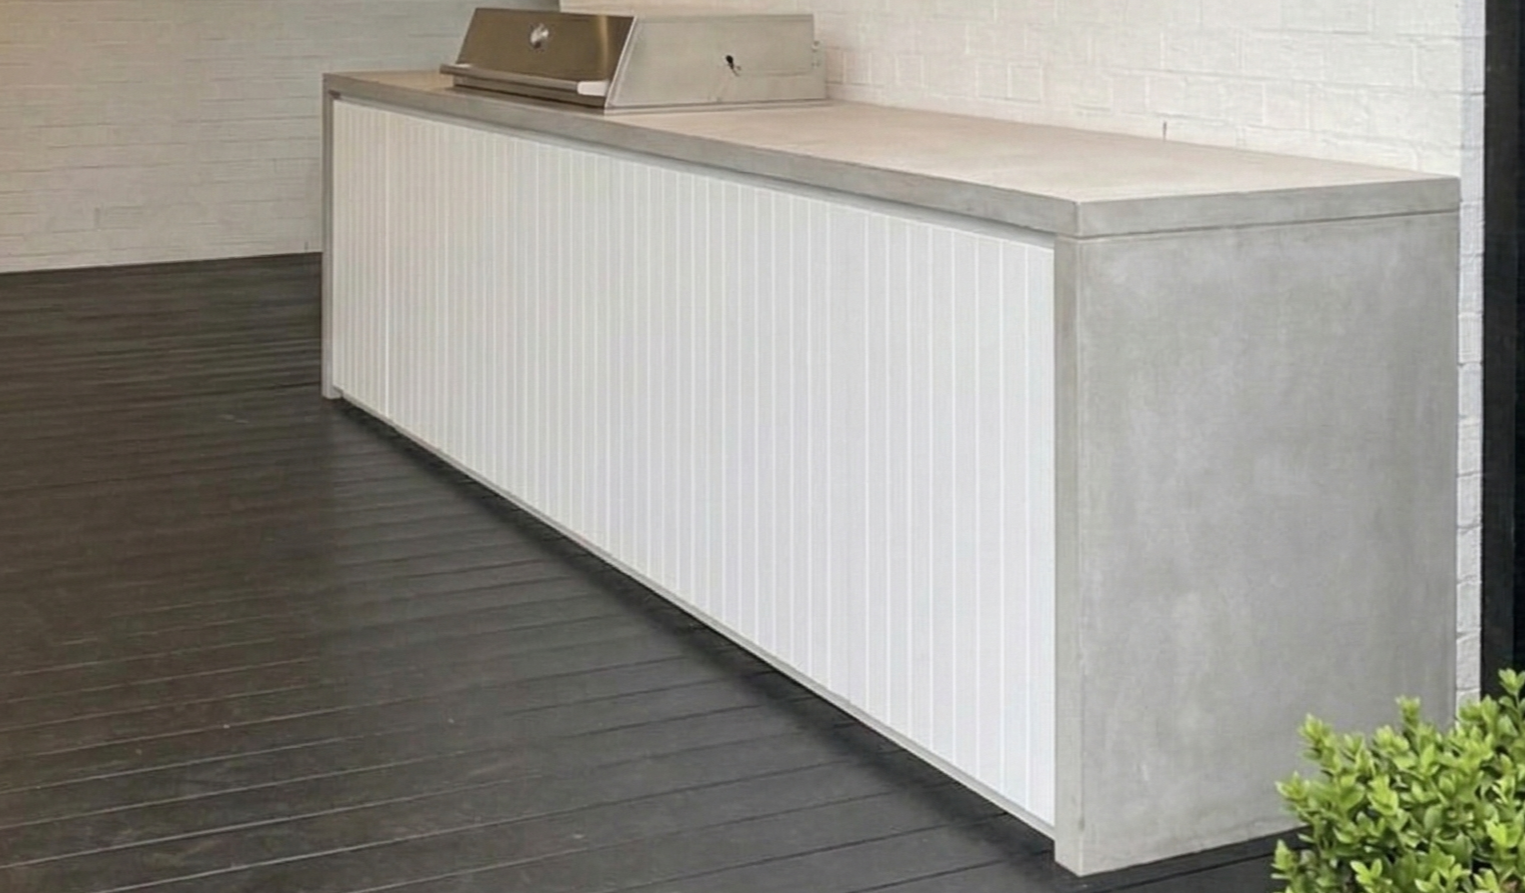
The completed Freshwater outdoor kitchen | Americano cladding in Surfmist, Iron Storm Lite concrete benchtop, built-in Beefeater BBQ
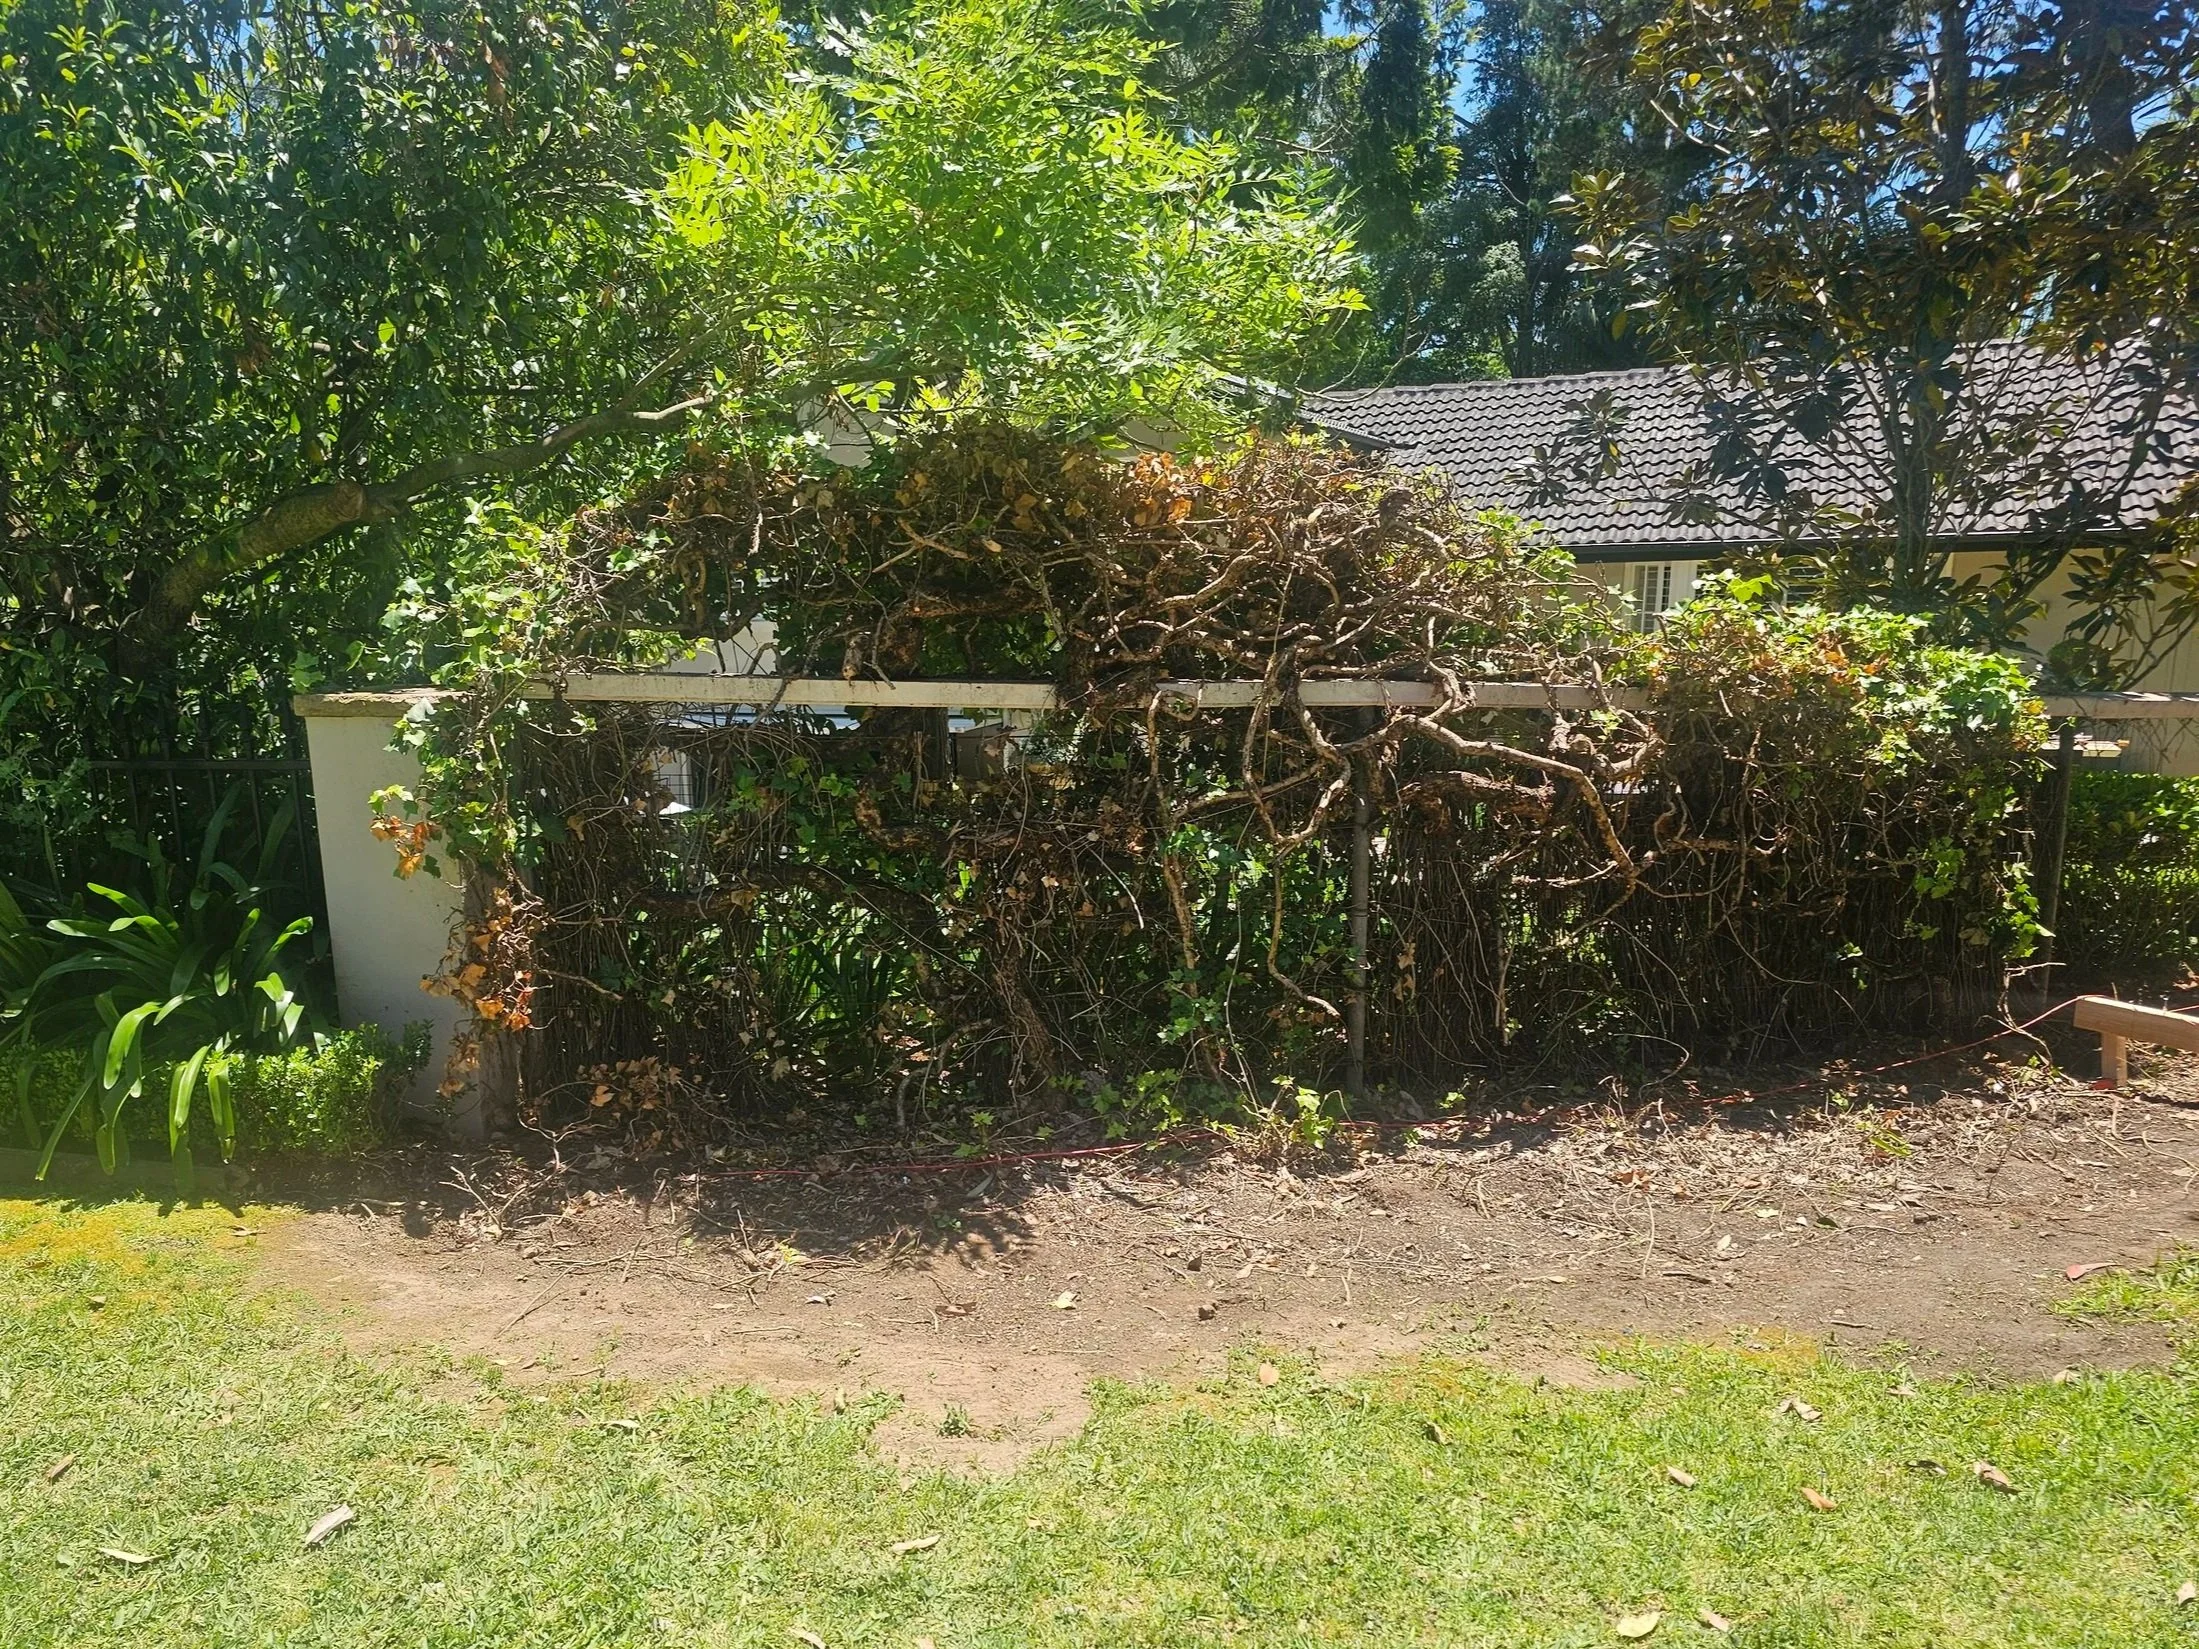
From Overgrown Ivy to a Modern Feature Fence, Turramurra
The brief | do something with that old fence
When the owners of this Turramurra home contacted us, the brief was straightforward. Their front boundary was an old bushwood fence that had seen better days; half of it was buried under years of overgrown ivy, the timber was rotting in places, and it did absolutely nothing for the street presence of an otherwise beautiful home.
They'd seen James Hardie Axon cladding used on a new build nearby and loved the look. Clean, modern, architectural. They wanted something that would hold up long term without constant maintenance, look sharp from the street, and add real value to the property. And they wanted lighting in it, which was non-negotiable from day one.
Turramurra homes are well-maintained, and street presence matters; people invest in quality. A new feature fence here isn't just a fence; it's an integral part of the property's overall look.
Project type |
Front boundary feature fence
Location |
Turramurra
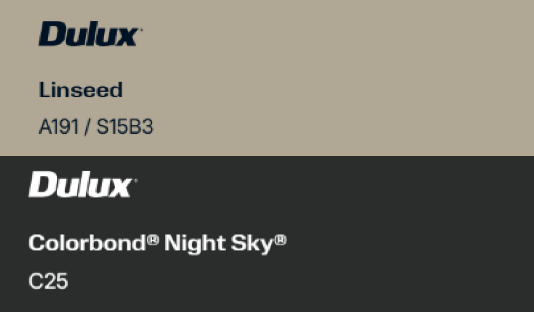
Colours |
Dulux Black Satin & Dulux Linseed
Cladding style |
James Hardie Axon 133mm
Framing |
H3 Frame & DAR 135mm H3 posts

Design Process |
Full 3D design before build
Conversations of the finer details
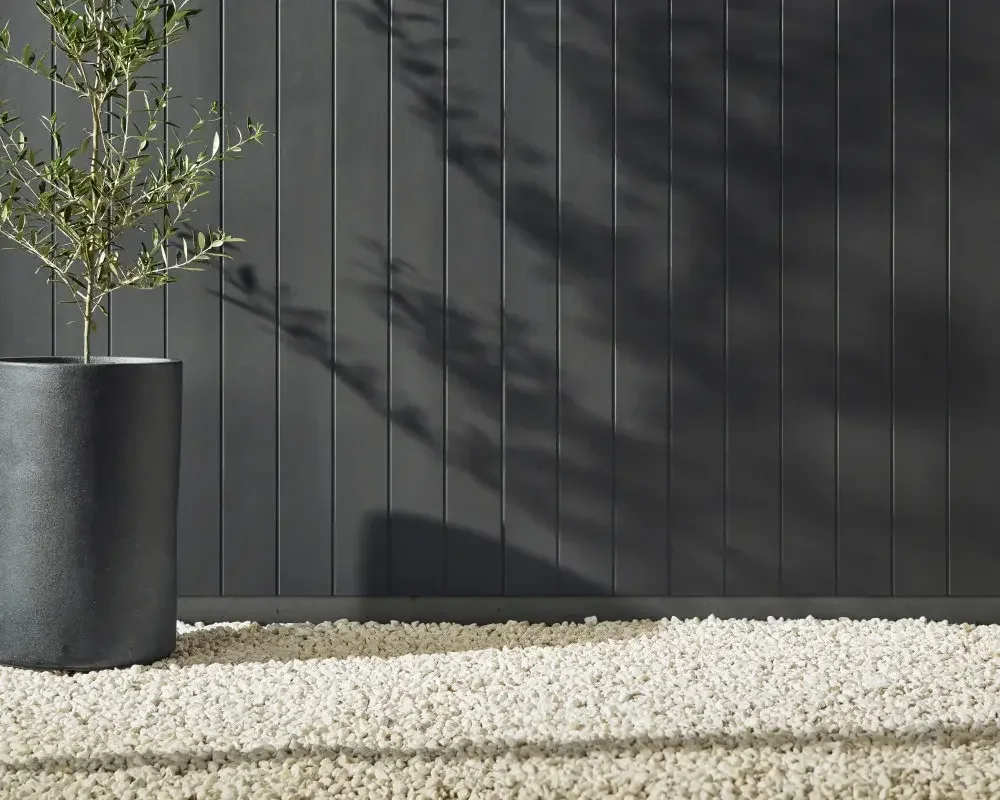
"It's the linseed on the posts & toprail that pulls it all together. The black recedes, the greenery comes forward & suddenly the whole front of the house feels considered."
The colour combination | why it works
The client wanted something that felt modern and sharp without being cold or industrial. The two-tone approach we landed on does exactly that.
Dulux Night sky | Axon cladding
Deep, rich black with a satin sheen. Absorbs light beautifully during the day and looks incredible after dark when the lighting kicks in. Satin finish is the right call over matte — it's easier to clean and holds up better on an external surface that takes weather and dust.
Dulux Linseed | posts and top rail
A warm, natural tone on the structural timber elements. This is what stops the fence from looking like a flat black wall. The linseed on the posts and top rail gives it depth, breaks up the black, and ties it back to the natural tones of the garden and home. It's a subtle detail that makes a big difference.
Why James Hardie Axon for a front boundary fence
We get asked about Axon cladding a lot, and it's become one of our favourite materials for feature fences and walls — especially in suburbs like Mosman, Neutral Bay and Cremorne where the street presentation really matters.
It's built to last. James Hardie makes their fibre cement products specifically for the Australian climate. Axon won't rot, it won't warp, and it doesn't need the same ongoing maintenance that a timber fence does. For a front boundary fence that's exposed to weather, UV and general life, that durability is a genuine selling point.
The profile is distinctive. Axon has a deep groove profile, which creates shadow lines that give the fence real visual depth. In the right light, especially at the end of the day, those grooves catch the sun, and the fence looks genuinely architectural rather than just a flat panel.
It paints beautifully. Fibre cement takes paint exceptionally well and holds it long-term. Dulux Black Satin on Axon looks like it was made for each other; the finish is clean, consistent, and doesn't fade the way you sometimes see with painted timber.
Subtle details
Our clients were clear from the start — they didn't want the fence to just stop. No square-cut posts, no flat cap rail, nothing that looked like the thinking stopped at eye level.
So we finished the posts with a federation-style detail at the top, and ran a simple top rail with a 25mm splay. Neither element screams for attention. That's the point. Together, they create a clean, considered transition that softens the whole fence line without adding visual noise.
Combined with the black satin and linseed colour combination, those small details are what push this from a well-built fence into something that genuinely looks designed.
"We don't want it to look like someone just cut it square and called it done. We wanted something subtle, a proper finish that complemented the fence rather than just ending it."
01 | Demo out with the old
First job was pulling out the old bushwood fence and clearing the ivy. That stuff gets into everything, roots under the footings, tendrils into any gap it can find. Full demo and removal was a full-day job before we could even think about the new build. Not to mention the amount of spiders we came across, big huntsman spiders & flying cockroaches. After the war of the Ivy was fnished now we had a clean slate from there.
02 | post prep & internal frames
After the demo, the fun begins, post prep. We started working on the post detail, routing, and splaying the tops of all the posts. After the detail on each post are complete, we begin with the extra treatment of all our cuts 1st rot treatment spray & then a generous primer coat. This is arguably an extremely important step that can be easily missed; treating every cut end properly can significantly prolong the quality & life span of our projects.
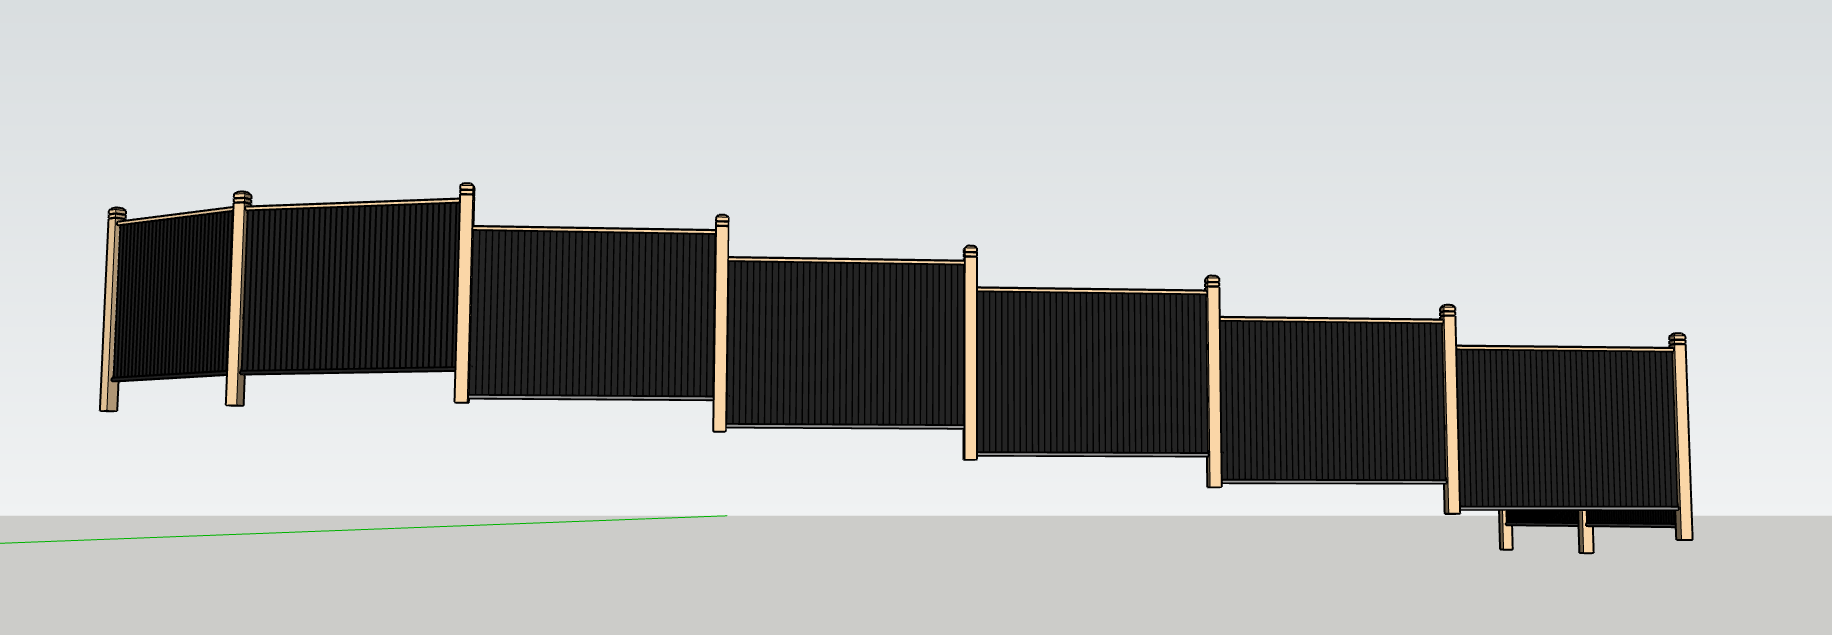
We also started building our internal frames, because we design all our projects with the scale 3D software, so we can pre-manufacture aspects of projects accurately and efficiently. After some frames were made and posts were completed, we worked out our heights and placed our posts into position. Again, with the use of out to scale 3d software, we accurately worked out each height rise in each bay to evenly step the heights across the whole front of the fence. Why, because uneven mismatching heights is for the amatures. After the post is in, we attach our pre-made frame to the post, prop it up, make it plumb and level, and then BANG, we repeat the process. Generally, we like to pour concrete footings towards the end of the day; we don't want to vibrate and wiggle the structure out of level and plumb while we are attaching other posts and frames.
03 | Axon Cladding Installation
The Installation of axon panels begins. We like to install the axon panels as we progress through the stages, as they can help stiffen up the structure and help tie the framing elements together. Every sheet is glued and screwed, especially at the joins. Axon caldding is an extremely stable product; it doesn’t twist and warp like alternative cheaper products. However, installing it correctly improves the performance and quality of our products over time. I like to apply the mentality of our process. Would you do what you're doing in front of the best carpenter in the world? After all, doing things properly is a choice, and do you want to go home proud of what you do or not?
After all the posts are installed and frames completed, we then install the rest of the axon cladding sheets. After they are completely installed, it’s on the top rail & trims.
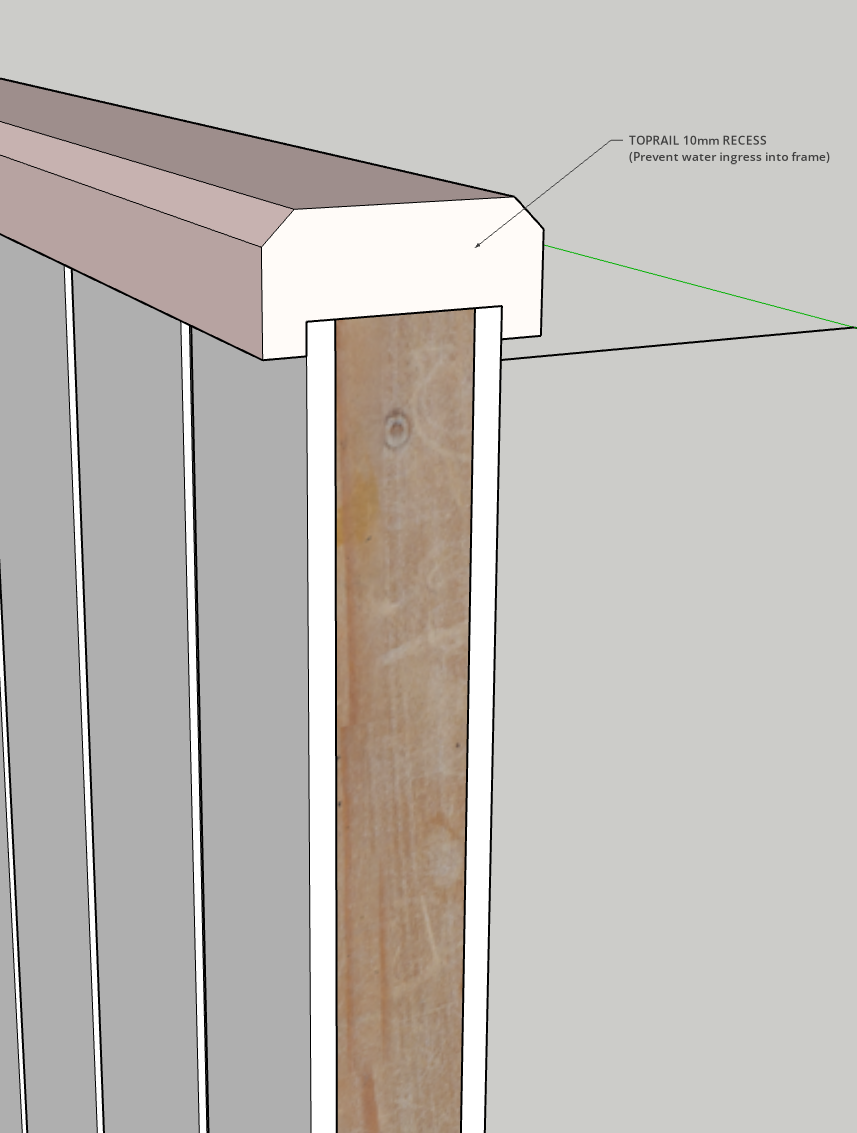
04 | Final Fix Top rials & Trims
This is where the real magic happens, this stage we commonly refer to as the 2nd Fix or Final Fix stage. This stage is where we install all our final finish details, like top rails and trims. Our top installation is not so easy. We decided to improve the quality, performance, and longevity of our project. We use the top as an element to waterproof the internal frame. Water is the enemy of longevity. By redirecting the water completely away from the internal elements of the frame, we have dramatically improved the life span of our fence.
05 | Extras Painting & Lighting
The lighting was planned from the start. At night, this thing looks completely different; the black panels disappear, and the light does all the work.
Painting is always a spicy topic; we are very adamant about using the right trades for the right jobs. You wouldn’t use a plumber to install a power point, and you would want a electrition to fix your toilet. This philosophy applies to painting; painters are always recommended because they use the correct paints from priming to finish, and of course have better knowledge and insights on best practices and methods, not to mention they’ll do a more professional finish. A common complaint is they charge a lot, our reply is always the same, trust me its cheaper paying once.
Seeing it before we built it — the 3D design
Every project starts with full to scale, rendered 3D model so you can see exactly what you'll get.
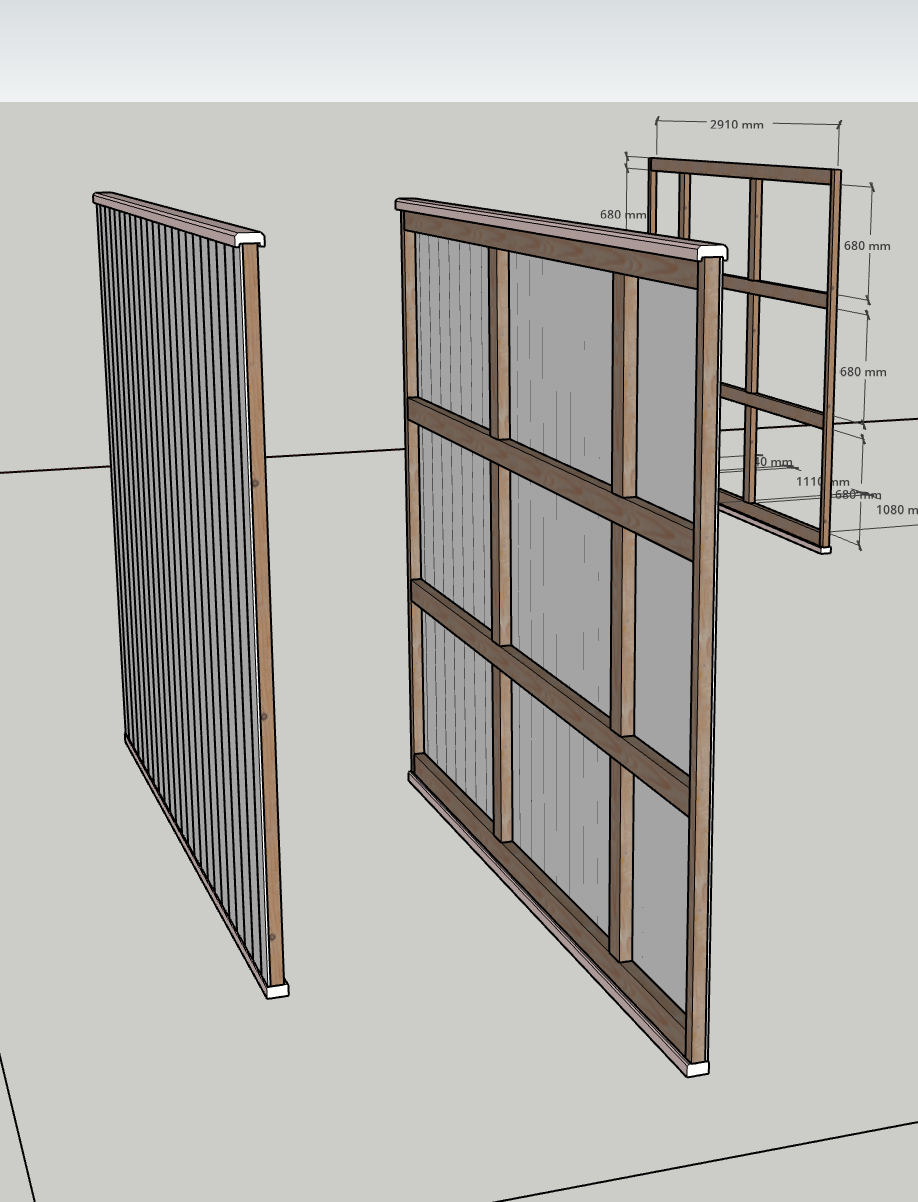
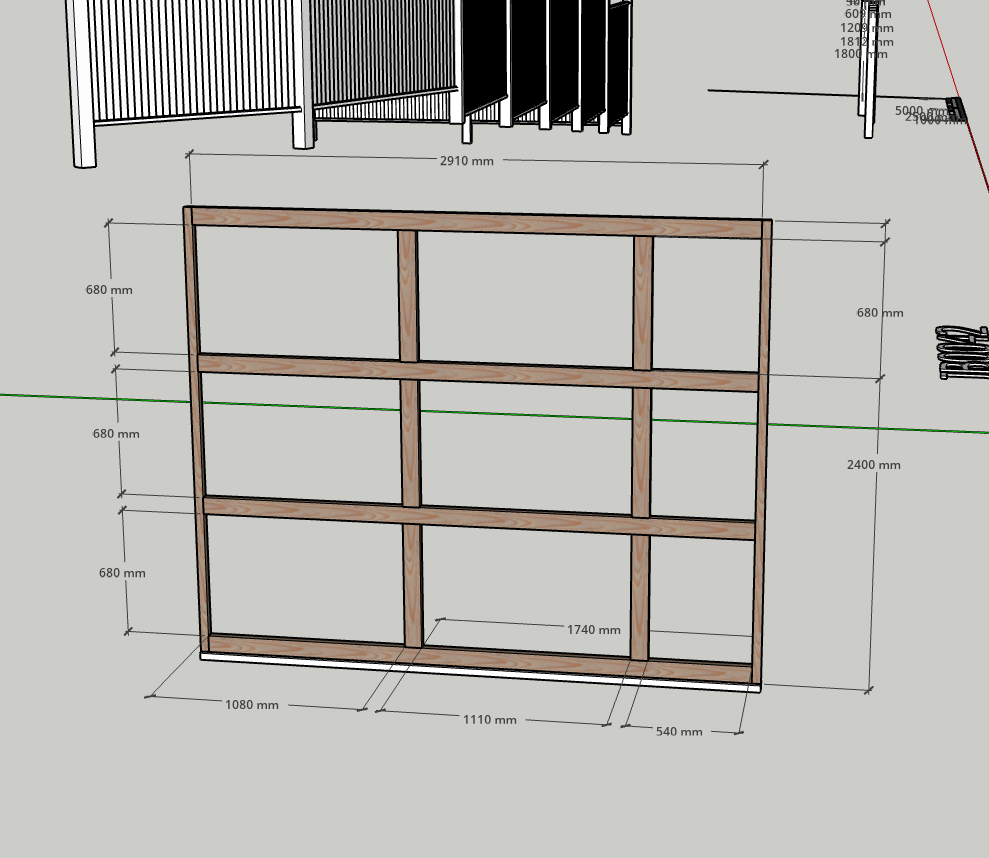
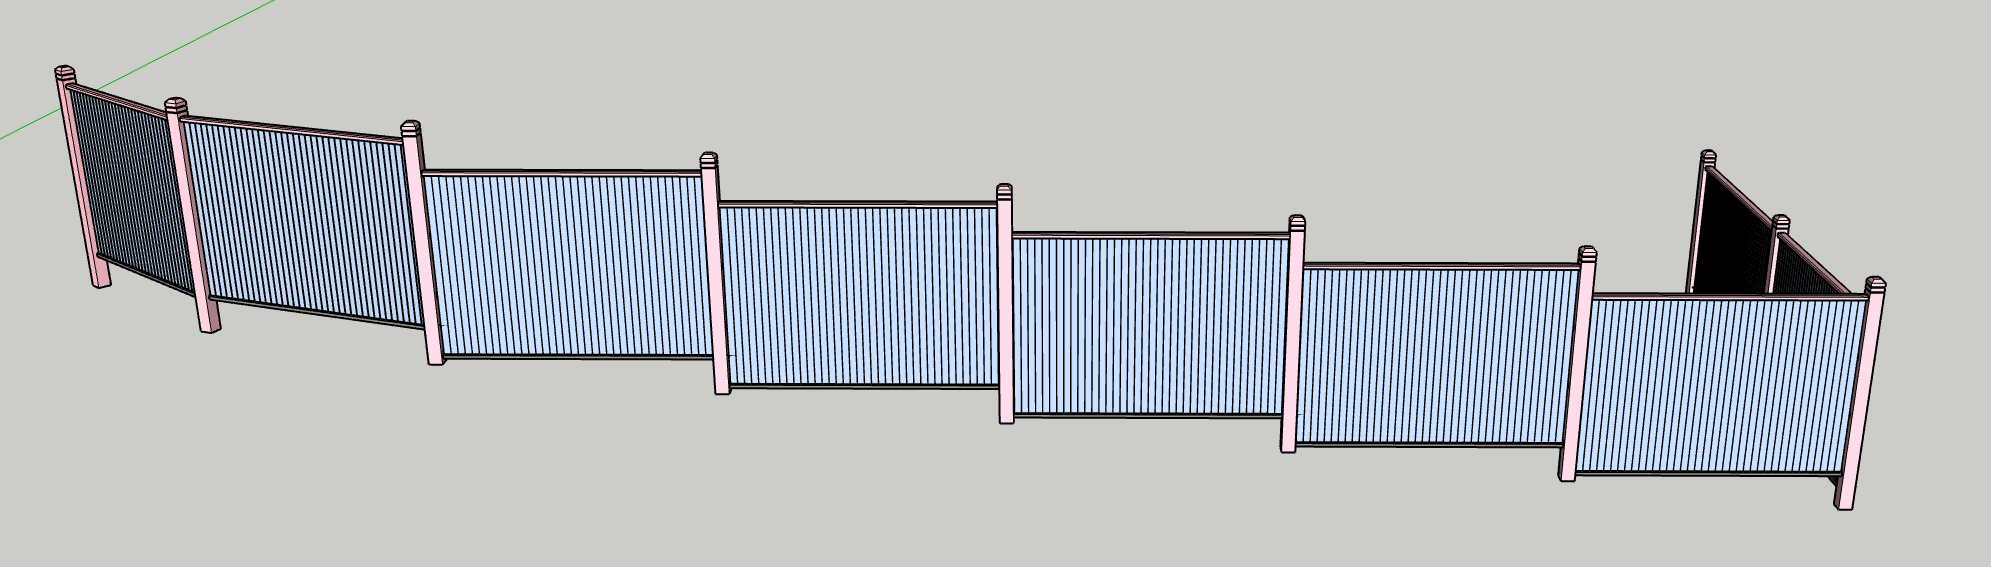
The 3D models we create are to scale and form the construction plan; they are extremely accurate, and we can completely build from them. Part of our process is to send these to the client to show how the project will be constructed.
The finished Feature fence
From an overgrown bushwood mess to a proper architectural statement for the front of the property. The owners couldn't believe the difference, and neither could their neighbours.

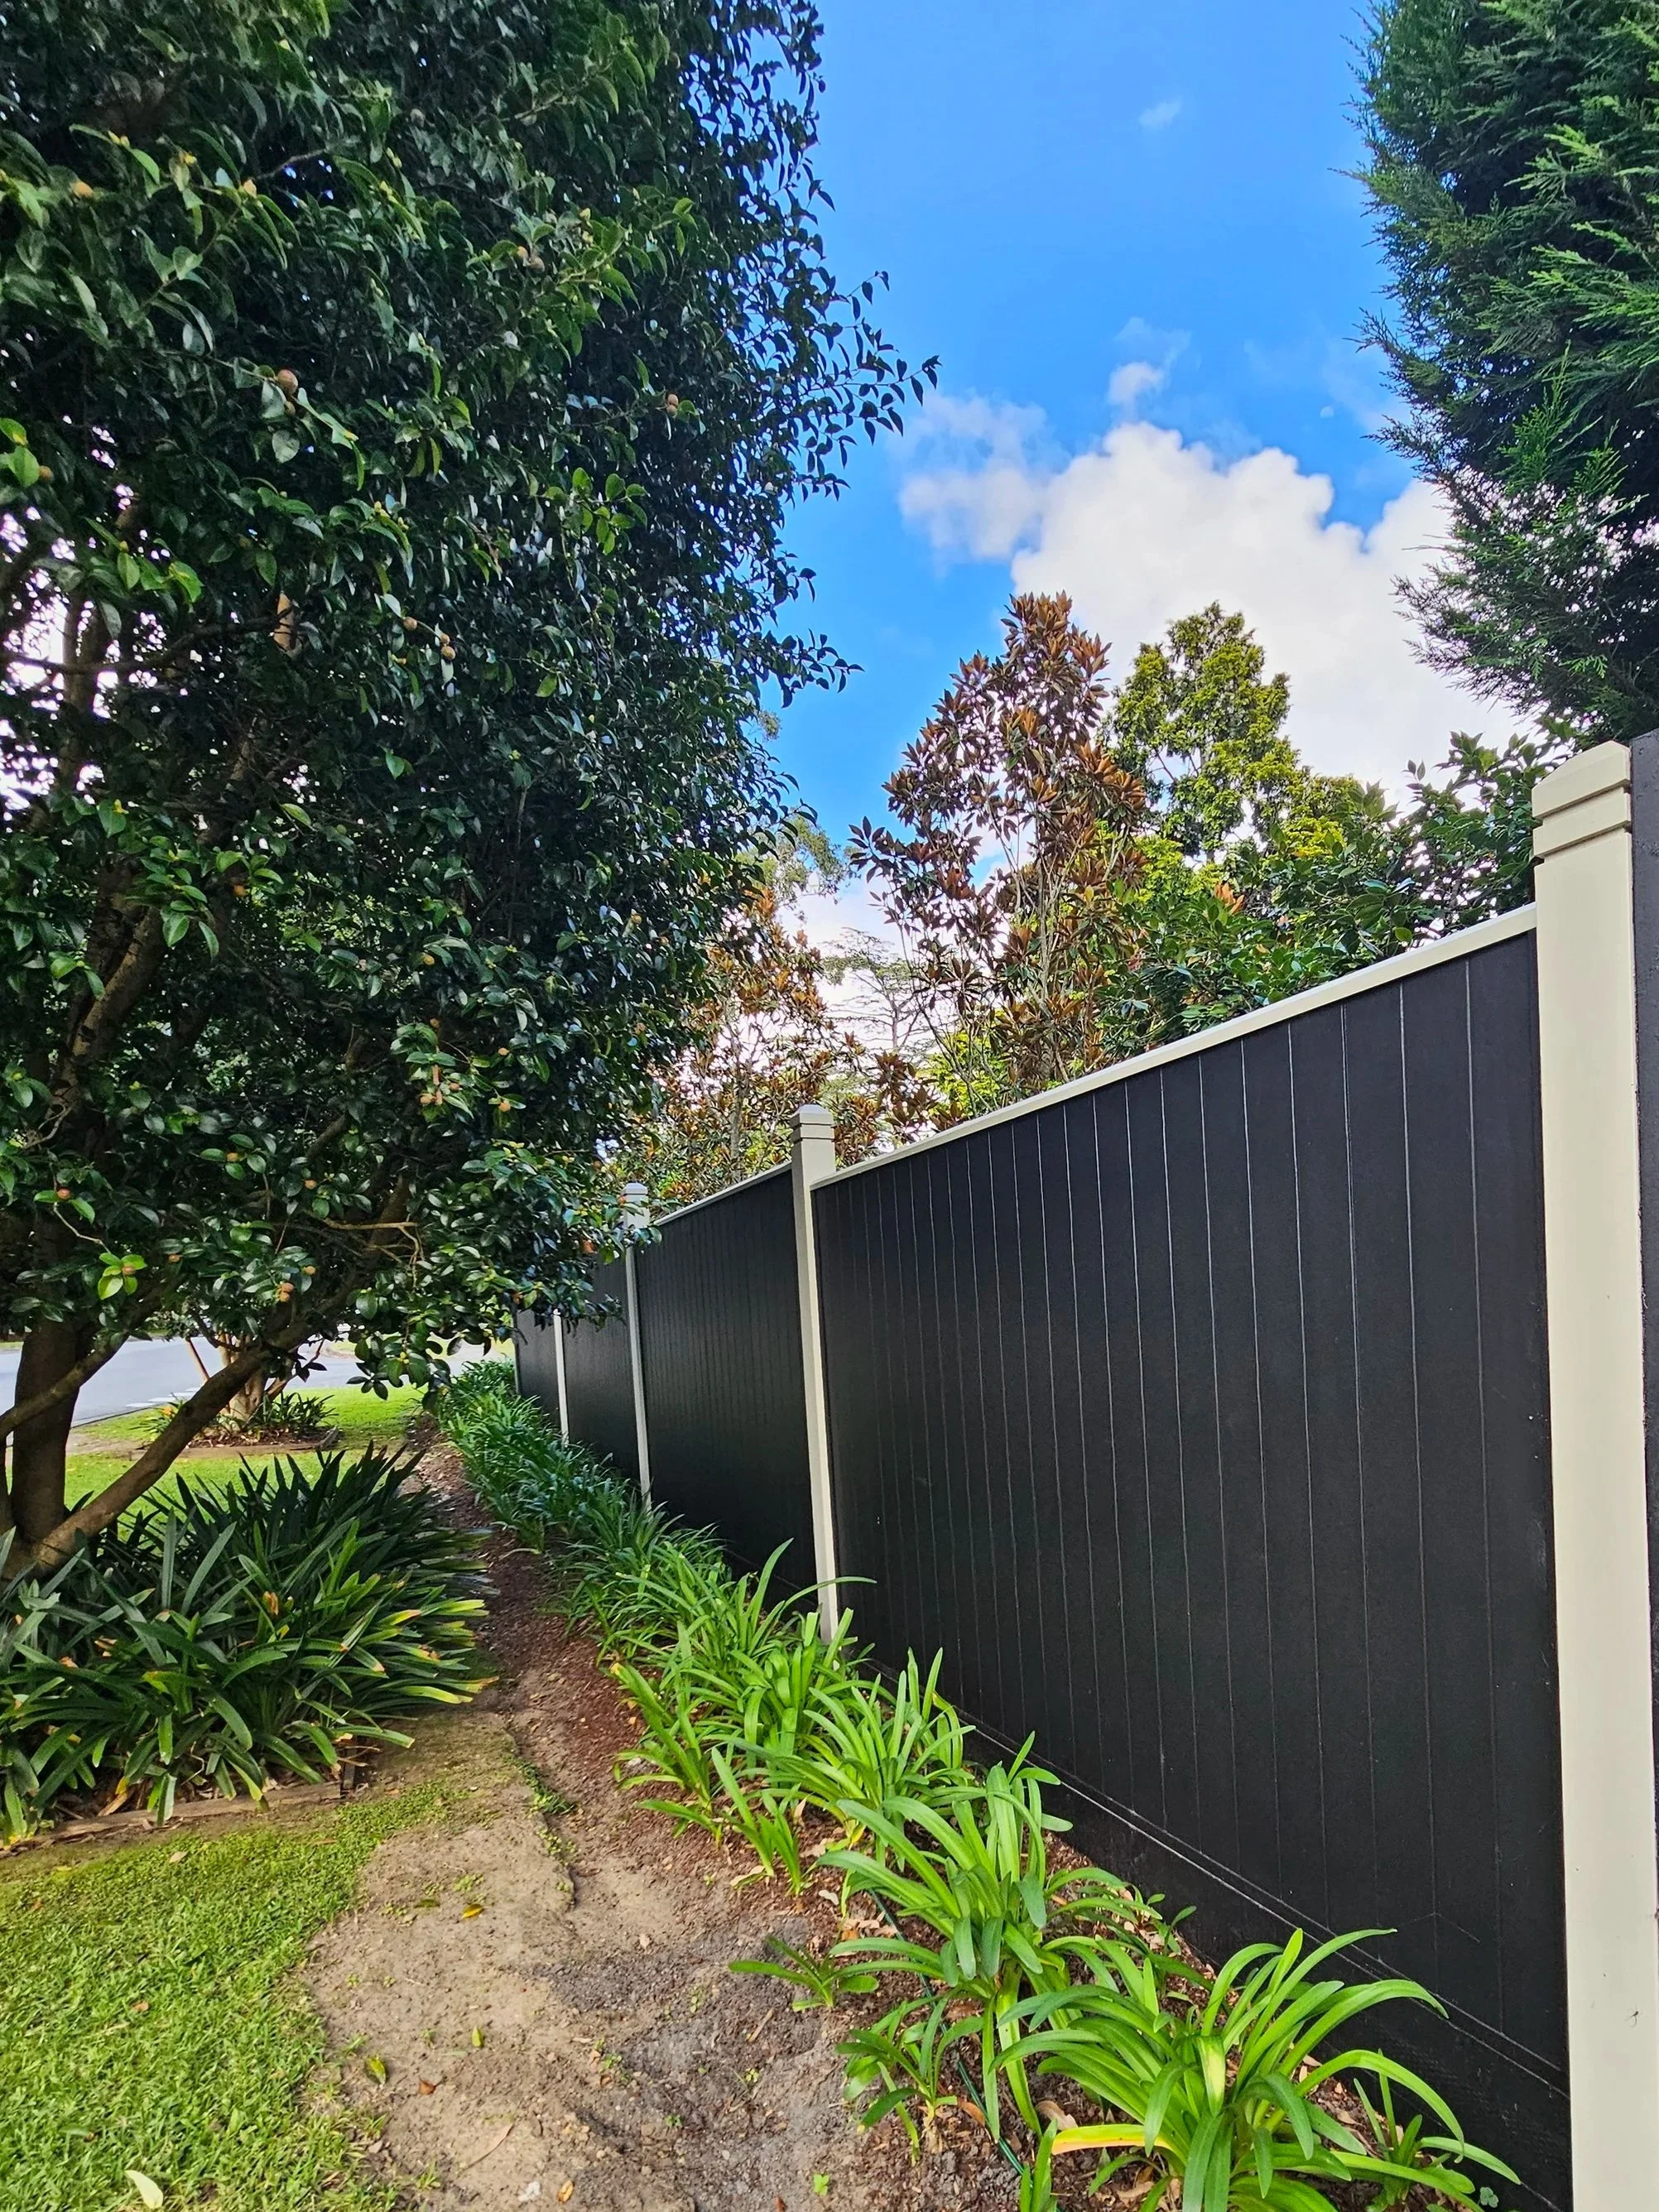
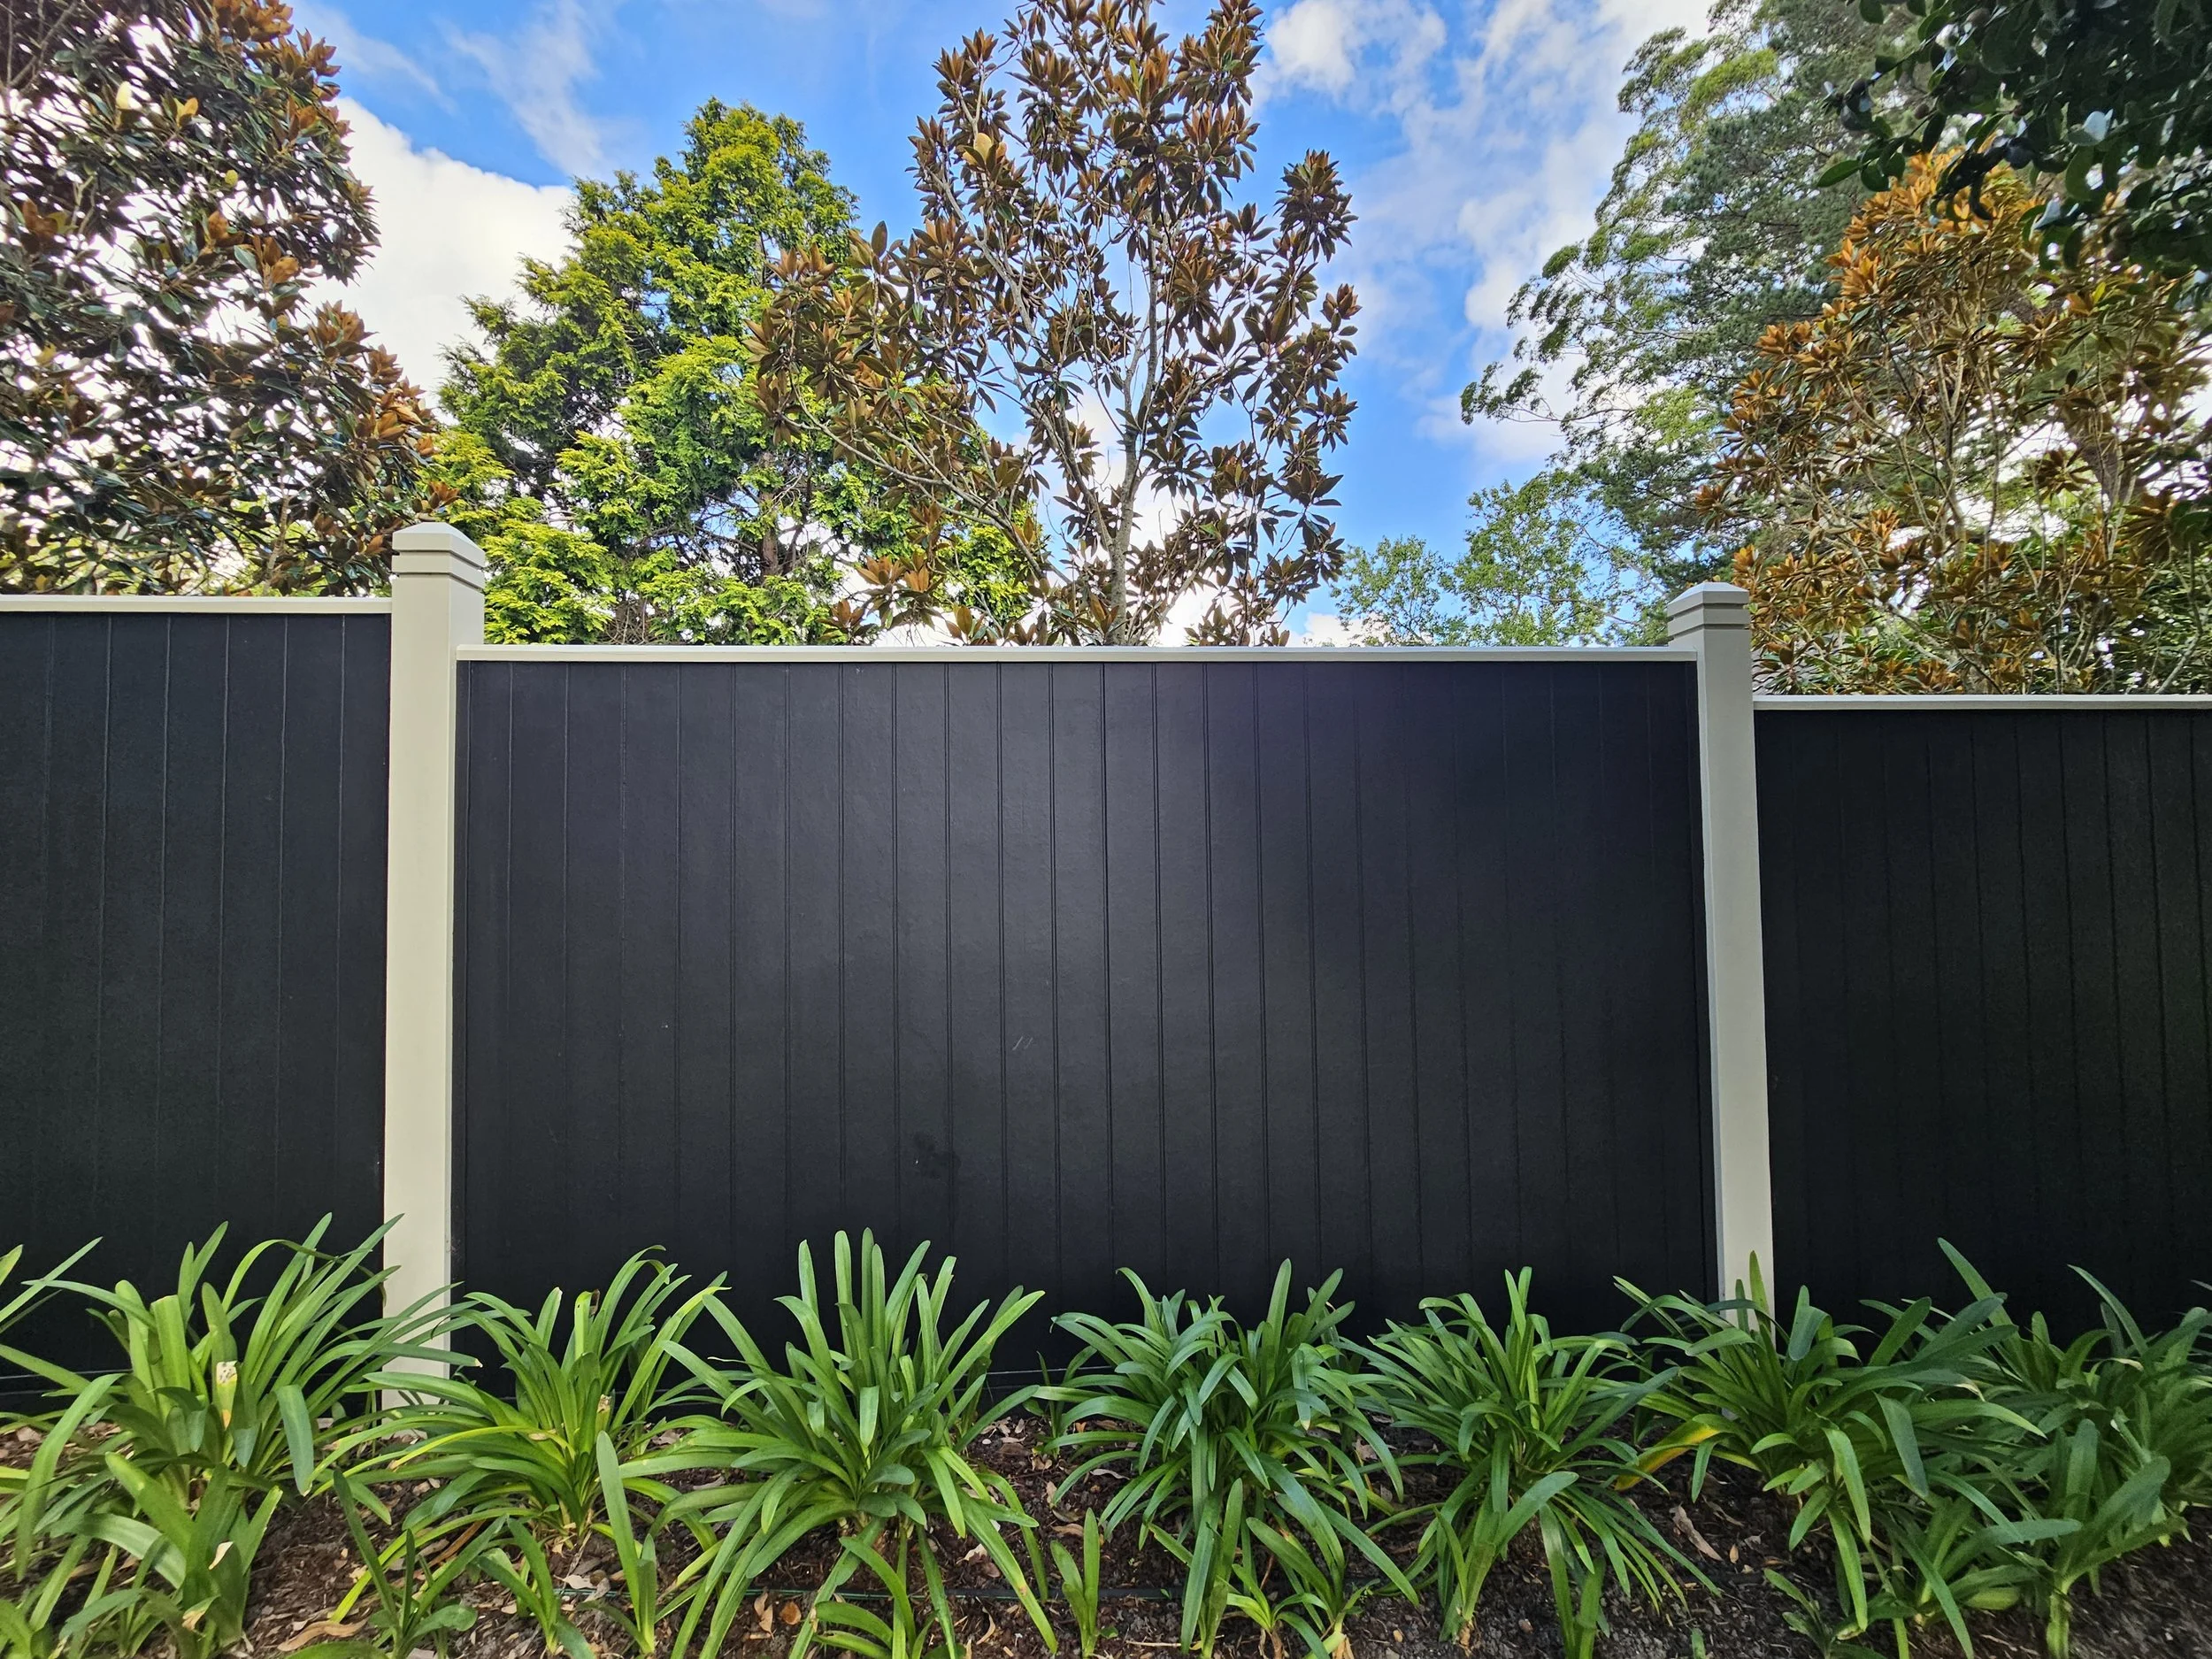

The completed Turramurra feature fence | James Hardie Axon in Dulux Black (Night Sky) Satin, linseed posts and top rail, integrated lighting